Thứ Tư, 28 tháng 9, 2016

Fix Can't Get Mail - The Connection to the Server Failed

Fix Can't Get Mail - The Connection to the Server Failed

iOS platform comes with a default mailing app, goes by the most generic name ‘Mail’. This POP3 based emailing client can log in to pretty much any popular email service out there and put all the emails in a single app platform, which should increase the productivity on user’s end. The first Mail app was showcased by Steve Jobs in 2007 while the first iPhone was introduced to the world, later on 2010 iPad first got the Mail app. Ever since the Mail app has never really disappeared from any device that runs iOS – iPhones, iPads and iPod Touch devices.
Fix Cannot Get Mail on iPhone
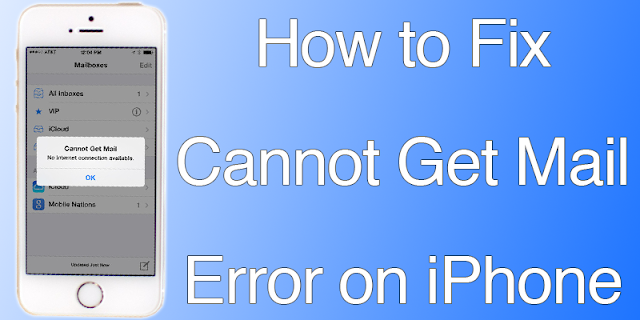
However, the Mail app isn’t all error free and at times, the platform may fail to grab the emails from their respective servers. The common error that shows up is ‘Cannot get mail the connection to the server failed’, almost every iOS user has faced this issue at least once during their iOS usage period.

How to Fix Cannot Get Mail Error on iPhone or iPad

Following are the ways to resolve the Mail app error in iOS:
  • Re-enter Password for Email Accounts: Maybe you have changed your password for the email accounts logged in with the Mail app, but didn’t update the password in your iOS Mail app. This is one of the most happening reasons for Mail app not working properly in iOS platform, the solution is very easy. Navigate to Settings > Mail, Contacts, Calendar > Account > Password. Check your account listings and change the password for all your accounts. Your Apple device could ask for Apple ID for security reasons. However, once you sign in to your email accounts through Mail with updated password, the emails will be fetched and the mailbox will be updated.
  • Haven’t Changed Passwords?: If you haven’t really changed the mail account passwords yet the problem is happening, then maybe changing the password for each of your email accounts might help. Log out of all the email accounts you use with Mail, change their individual passwords through the web interfaces and re-login to these accounts using Mail. The problem should be solved.
  • Move Emails: Create a new email folder using the Mail app and move your emails to the new folder. Try syncing the new folder with your mailboxes. This should force the email accounts to sync each email with the new created folder in Mail app and the user should have new emails synced to the Mail app UI.
  • For Microsoft Exchange Accounts: The security settings for Microsoft Exchange Account may impose some conflicts in the email app. To resolve this issue, user needs to open Active Directory Users and Computers which is a tool for Microsoft Management Console. As it appears, a Windows based computer would offer better help.
  1. Inside this program, open View > Advanced Features and find your email account from the new window that opens.
  2. Click on Properties, then open the Security tab in the new dialogue box.
  3. Click on Advanced and check ‘Include inheritable permission from this object’s parent’ on the new dialogue box that pops up.
sửa lỗi không nhận được email trong iphone 
(kết nối không thành công)

làm thế nào để sữa lỗi . chúng ta bắt đầu thôi nào.
rất đơn giãn, hãy làm theo các bước sau :
1. vào Settings > Mail, Contacts, Calendar > Account > Password và nhập lại mật khẩu của bạn vào
2. kiểm tra lại mật khẩu xem gần đây bạn có thay đổi mật khẩu không, nếu có nhập mật khẩu mới vào
3. tạo một folder mới và chuyển thư vào đó, hoặc xóa bớt thư không quan trọng, nếu quá nhiều thư
4 . nếu bạn đang sử dụng tài khoản microsoft thì hãy vào trình safari và đăng nhập lại, sau đó thoát ra từ mail của iphone , rồi đăng nhập lại , thì sẽ thành công.
Read More

Fix iTunes Error 3014 When Updating & Restoring iPhone

iPhones are indeed very advanced smartphones, yet iOS isn’t really all error-free. This software platform often runs into trouble, the errors are typically user serviceable but unless the correct steps are taken, it might cause a trouble for an iPhone user. iPhone error 3014, also known as iTunes error 3014 is quite common and a lot of people had faced this lately – because a lot of people are trying to update to the iOS 10 that was rolled out just 2 days ago. iTunes encounter error 3014 mostly due to communication error between the computer and Apple servers, but there are other known problems as well.
Fix iTunes error 3014

How to fix iTunes error 3014 When you Restore / Update iPhone

Below are the top 6 tested methods to fix iTunes error 3014 and complete the restore process:
  1. Confirm Having the Latest Version of iTunes: Apparently, in order to download the latest version of iOS and install in your iPhone, iPad or iPod Touch, the latest version of iTunes should be installed on a computer. The older versions may not be able to set the connection parameters right, also there might be a conflict between different versions of iOS and iTunes.
  2. Check your Computer’s Date & Time: Having a wrong date and time on your computer would create trouble with the internet connectivity. In order to have flawless internet connectivity, having the accurate time zone and date set in a computer is necessary. If you use a Windows computer, click on the bottom right corner on the task bar and change the date & time into proper values. Try using iTunes after you are done.
  3. Operating System on your Computer: Although this is one of the minor issues that might cause an iTunes error, yet having the latest operating system installed on your computer is the safest bet. If you use Windows platform then check for Windows update using Control Panel. For Macintosh users, you should have update notification if an update is available – update accordingly.
  1. Check Internet Connectivity: If everything mentioned above is okay on your computer, the issue could be with your internet connectivity. Maybe iTunes on your computer can’t reach the Apple servers and giving you error 3014, because that’s common. Check whether any ports are blocked on your computer’s network settings, or even your router. If everything seems alright then it could be an ISP issue as well.
  2. Security Barrier: Almost every Windows user keeps a security software in their computer and they often block iTunes. The firewall would block iTunes server connections if an exception is not added in your firewall program. However, the antivirus software may even identify iTunes as a malware. Check with your security program for such issues. 
  3.  Check HOSTS Files: This is slightly advanced level task than the previous ones we have mentioned here. Open this location C:WindowsSystem32drivers\etc in your Windows computer, and locate the HOSTS file. This file should open with Notepad in your computer. If your iPhone is jailbroken and you have SHSH blob files located at Cydia or any other jailbreaking servers then you would have to add an IP address to the HOSTS file. Add this line at the end of the HOSTS file 74.208.10.249 gs.apple.com.


khắc phục iTunes Error 3014 khi update & restore

1. kiểm tra cập nhật itunes mới nhất ở đây

2. cài đặt ngày tháng chính xác trong máy tính

3. gỡ bỏ itunes cũ cài lại itunes mới nhất

4. kiểm tra kết nối mạng (itunes cần mạng để xác minh)

5. không bật tường lửa với phần mềm

6. file host trong hệ thống phải có dòng 74.208.10.249 gs.apple.com nếu thiếu dòng này các bạn có thể thêm vào.

Read More

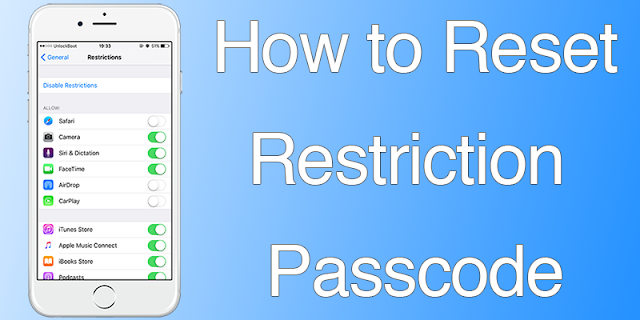
Reset Restriction Passcode On iPhone or iPad

Reset Restriction Passcode On iPhone & iPad Using iBackupBot 2016

You might already know the process to reset Restriction passcode via the jailbreak tweak iFile. Nothing is simpler to reset a passcode that’s forgotten. But if your iOS device is jailbroken, then how to reset restriction passcode on iPhone or iPad?
Reset Restriction Passcode On iPhone

How to Reset Restriction Passcode On iPhone or iPad

As no jailbreak is involved, you need to take more steps to reset restriction passcode on iPhone without a fresh, complete restore that risks losing of data.
For the jailbreak method, here’s a short summary:
  1. Manually keying in a value overrides the restriction passcode.
  2. In Library/Preferences/, the file “come.apple.springboard.plist” is to be edited.
The editing process, however, is where the issue is. How can the file be edited and uploaded to the iPhone’s system again? The process to reset restriction passcode on iPhone is a bit longer, but not impossible without jailbreak. You need these 3 things:
Try the restriction passcode a few times before you start. A “failed attempt” alert should appear when tapping on Restrictions.

Do a Backup with iTunes

  • Connect iDevice to PC.
  • Open iTunes and make a backup.
  • Quit iTunes after backup but keep iDevice connected.

How To Edit Backup file

  1. Launch iBackupBot.
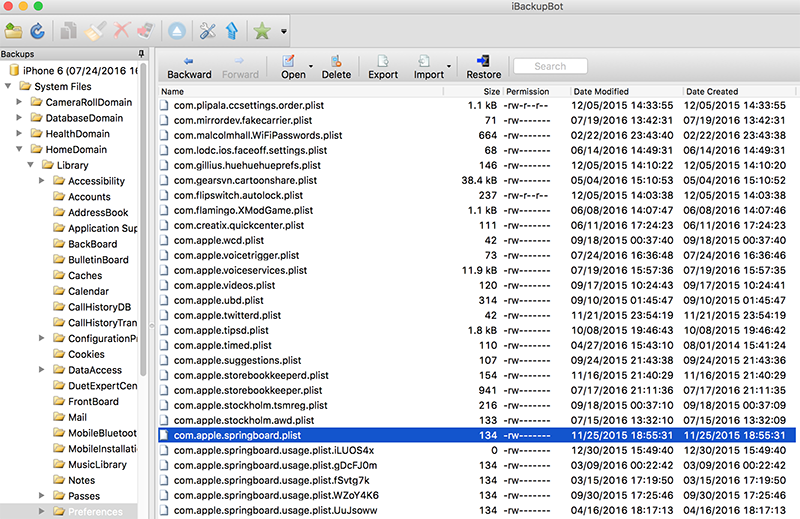
  2. Go to SystemFiles/HomeDomain/Library/Preferences
  3. Look for a file called com.apple.springboard.plist
Change Restriction Passcode on iPhone
  1. Open in Notepad or any text editor. Use any plist-editors if the file fails to render properly.
  2. Look for the following line:
<key>SBParentalControlsFailedAttempts</key>
<string>X</string>
(Any number is X)
  1. Below this line, add this code:
<key>SBParentalControlsPIN</key>
<string>1234</string>

  1. Save the file and restore it in iPhone through iBackupBot (press Control + T).
Now reboot your iPhone and press 1234 to restrict passcode. It should work.
That’s all. You can then disable or reset restriction passcode on iPhone.


khôi phục mã giới hạn trong iPhone & iPad dùng iBackupBot 2016

đôi khi bạn quên mã giới hạn iphone của mình . bạn không  phải lo lắng nếu chiếc iphone của bạn đã được jailbreak . nếu chưa được jailbreak thì bạn làm theo hướng dẫn jailbreak này hoặc có thể tìm hiểu thêm trong blog của mình có rất nhiều bài hướng dẫn. mọi việc sẽ trở nên thật đơn giãn. giờ chúng ta bắt đầu nào.
Reset Restriction Passcode On iPhone

làm thể nào để khôi phục mã giới hạn trong idevices

trong tay bạn là chiếc iphone đang bị khóa mã giới hạn. một số tính năng bị hạn chế vì bạn không thể cài đạt được khi không có mã giới hạn. nếu iphone đã được jailbreak thì điều này thật đơn giãn để giải quyết vấn đề , mà không cần phải chạy lại chương trình , không mất dữ kiệu của bạn.

các bước thực hiện như sau:
  1. vào thư mục Library/Preferences/ và tìm đến tệp tin “come.apple.springboard.plist”
  2. mở tệp và chỉnh lại mã giới hạn
yêu cầu:

tạo bản sao lưu bằng itune

  • kết nối thiết bị với PC.
  • mở itunes và nhấn vào sao lưu.
  • thoát itunes khi sao lưu thành công vẫn giữ kết nối với iphone.

thực hiện chỉnh sửa tệp tin sao lưu

  1. chạy iBackupBot.
  2. tìm đến SystemFiles/HomeDomain/Library/Preferences
  3. tìm tệp com.apple.springboard.plist
Change Restriction Passcode on iPhone
  1. nhấn đúp vào tệp tin để mở
  2. tìm đến dòng:
<key>SBParentalControlsFailedAttempts</key>
<string>X</string>
(X có thể là số bất kỳ, đây chính là mã giới hạn)
  1. giờ ta biên tập thành:
<key>SBParentalControlsPIN</key>
<string>0000</string>
( 0000 là mã giới hạn mới, bạn có thể giữ nguyên mã hoặc đổi số bất kỳ nếu muốn )
  1. lưu lại rồi thoát iBackupBot (nhấn Control + T). khởi động lại iphone
giờ mã giới hạn mới là 0000. bạn thể xóa hoặc dùng mà này để bật tính năng bị hạn chế trước đó.


Read More

Download iFile iPhone App Without Jailbreak

Download iFile iPhone App Without Jailbreak

Download iFile for iPhone
It’s essential to have an app that manages and knows your iPhone, and you need to have the best one. iFile is one of the most recommended apps for the purpose. Since it’s not there on the App Store, download iFile iPhone app can be a challenge, especially if you device is not jailbroken. For those who don’t know, iFile stores all the files in a single place so that they can be accessed easily and save time. There are several ways to download iFile iPhone app without jailbreak, and here’s an easy one!

Easy way to Download iFile iPhone App

We can understand that jailbreaking may not be an option for you. This mentioned website is the answer to your issue. It is compatible with the latest iOS version, and can be installed on all Apple devices.
  1. Launch Safari on any browser and enter this URL: ifile.
  2. A window will pop up with a Download link. Press download and after a few seconds, a pop up will appear with the install option. Start the installation by clicking “install”.
Install iFile iPhone
Before download iFile iPhone app without jailbreak or Cydia, follow the steps mentioned below.

Setting changes before installing iFile on iDevice

Now, since the device is not jailbroken, there is a minor tweak that needs to be done on Settings. Change your iPhone’s date to a month before. For instance, if today is 7th April, 2016, change it to 7th or 8th March, 2015. Reports say that this works even if the date is changed back to the year before the date of installation. There is no need to worry; this needs to be done once. After installation is done, the date can be changed to the present one.
Install iFile Without Jailbreak
Also, depending on the connection, download iFile iPhone app won’t take much time. After installation, head to the main screen and search for the iFile icon. Tap it and iFile will manage files. The app is recommended as it’s a 1-stop-shop for all regular app demands like install, delete, cut, paste, copy and other functions.
It’s the complete app for your device. Without jailbreaking the iPhone, the above-mentioned instructions are the simplest way to download iFile iPhone app.


cài iFile cho iPhone không cần Jailbreak

Download iFile for iPhone
một ứng dụng tuyệt vời cho iphone. giúp chúng ta có thể làm nhiều hơn những gì có thể với chiếc điện thoại của mình. không còn nghi ngờ gì nữa nếu ai đã tùng sử dụng chiếc iphone được jailbreak, thì sẽ hiểu ifile có tác dụng lớn lao thế nào. thế nhưng đôi khi các bạn lại không muốn hoặc không thể jailbreak iphone của mình vì phiên bản ios quá mới chưa hỗ trợ.

đây là cách đơn giãn nhất để có ứng dụng ifile  :

  1. vào Safari và click vào đây: ifile.
  2. một cửa sổ mới hiện ra , nhấn vào Download link. sau đó nhấn vào  “install” trong chiếc iphone của bạn
Install iFile iPhone

lưu ý khi cài ifile

cài đặt thời gian bằng tay trở về 07-03-2015. sau đó mới tiến hành cài đặt. sau khi cài đặt thành công các bạn có thể chỉnh lại mốc thời gian hiện tại. sẽ không có điều gì bất tiện cả.
Install iFile Without Jailbreak


cài đặt này sẽ chỉ tốn khoảng 5 phút . rất nhanh chóng đúng không nào. sau khi hoàn thành thì biểu tượng ifile sẽ xuất hiện giống như các ứng dụng bình thường khác. nhấn vào biểu tượng và bắt đàu sử dụng thôi nào.
Read More

Boost iPhone WiFi Signal Strength

How to Boost iPhone WiFi Signal Strength

WiFi issues are not common for iPhone users. However, there are always instances when the WiFi signal goes down, and it sucks when that happens. Did you know that it’s not very difficult to boost iPhone WiFI signal? That is important to do as poor WiFi reception slows downloads, makes streaming crappy, etc.
Boost iPhone WiFi Signal

5 Ways to Boost WiFi Signal on iPhone / iPad

Here’s What You Can Do to boost iPhone WiFi Signal Strength:

1: Remove the Case

Improve WiFi Signal on iPhone
If there’s a case on your iPhone, it could be blocking the WiFi reception. Cases made out of silicone rubber, TPU or plastic don’t interfere with reception, but other materials might cause an issue. The easiest way to get your iPhone WiFi signal back strong is to remove the case. Especially if you use a metal case - you must to remove it to get better WiFi and GSM signal. You need to test this step though, as the issue could be something else.

2: Restart WiFi & iPhone

Restart the WiFi modem/router to clean a few clogs. You may be able to boost iPhone WiFi signal by switching off the WiFi and turning it back on after a minute’s interval. You can also do the same with iPhone, turning it off, waiting a minute, and turning it back on to see if it solves the issue.

3: Set Manual DNS on iPad/iPhone

Boost WiFib Signal on iPhone
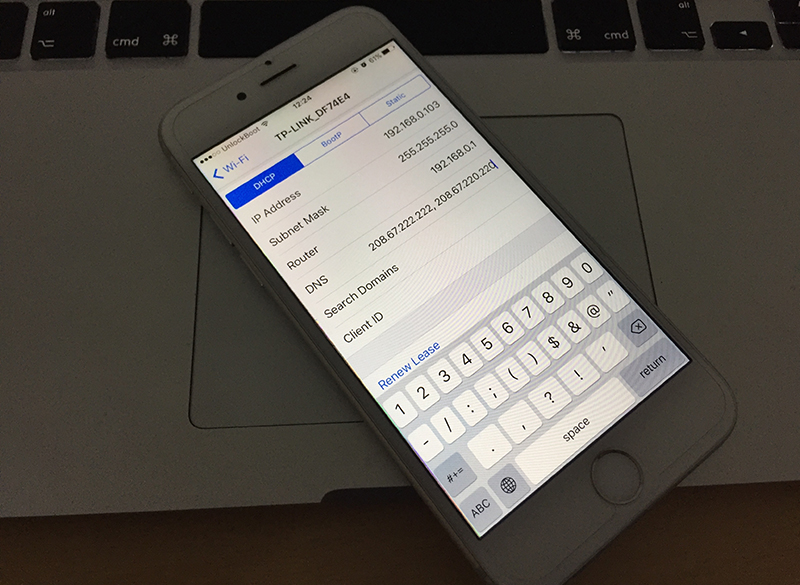
In iPhone’s preferences, you can set up manual DNS to capture data from the web. This can be done with the following steps:
  1. Google IP addresses: 8.8.4.4, 8.8.8.8 are two you can use.
  2. OpenDNS: 208.67.220.220, 208.67.222.222
  3. Launch Settings – WiFi – Tap “i” icon on the connected WiFi network’s right.
  4. Scroll below and select DNS. Enter any of the DNS addresses given as they are.
  5. Restart iPhone’s WiFi.
While automatic DNS setup is optimal, it doesn’t work in some instances. In such situations, OpenDNS, Google, and other public DNS work to boost iPhone WiFi signal.

4: Update the iOS Firmware

Software Update iPhone
Consider this measure an afterthought, as there are no boost iPhone WiFi signal related updates in the current version. However, it’s best to keep your iPhone updated to the newest firmware.

5: Invest in a New Router

A new router can often fix WiFi issues. Test a new router for a few days to see if you are able to boost iPhone WiFi signal. If the signal strength is good with the new router, than the issue of bad signals was surely due to your old router. You can also borrow a router from a friend to test the WiFi before investing in a new one.
With these tips, you’ll surely be able to boost iPhone WiFi signal.
Read More

Fix Pokemon Go Crashing on Startup on iPhone

How to Fix Pokemon Go Crashing on Startup on iPhone

Pokemon Go is now officially the most popular game on earth. It has surpassed the most popular online game Candy Crush Saga last week, and few statistics said people now prefer Pokemon Go over porn! If that doesn’t lure you into trying Pokemon Go for at least once, then what will?
Fix Pokemon Go Crashing on Startup

Fix Pokemon Go Crashing Constantly on iPhone

However, Pokemon Go is only at its initial stage and not totally bug free. Most of the world’s regions are still outside of the Pokemon Go coverage, thus you may not find any Pokemons in your Pokemon Go interface except the very first Pokemon they give you for the training. The Pokemon love of people across the world is getting more intense, but the server issues are causing trouble. Lost connection with server, Pokemon Go Crashing on startup or unresponsive Pokemon Go app are common issues with iPhones and iPads right now, and that’s not letting the players have the fun to the fullest while playing Pokemon Go.
If you use an iPhone or iPad and Pokemon Go App crashing on startup or you got a server connection issues on your device, then keep on reading through the following to know what your steps should be.

1: Wait for Sometime and try Again

Pokemon Go servers were halted few days ago due to overload, and technical errors like that could happen again. In the most cases users got this error: Our servers are humbled by your incredible response. If you find your Pokemon Go app on iPhone or iPad is unresponsive, close the app, kill it from the background, disconnect your internet and wait few minutes till you start all these back on again. Also, ensure your internet service provider isn’t blocking access to the Pokemon Go servers. Start over the whole process after waiting few minutes and see if the issues are resolved.

2: Update or Reinstall

Pokemon Go Crashing on iPhone
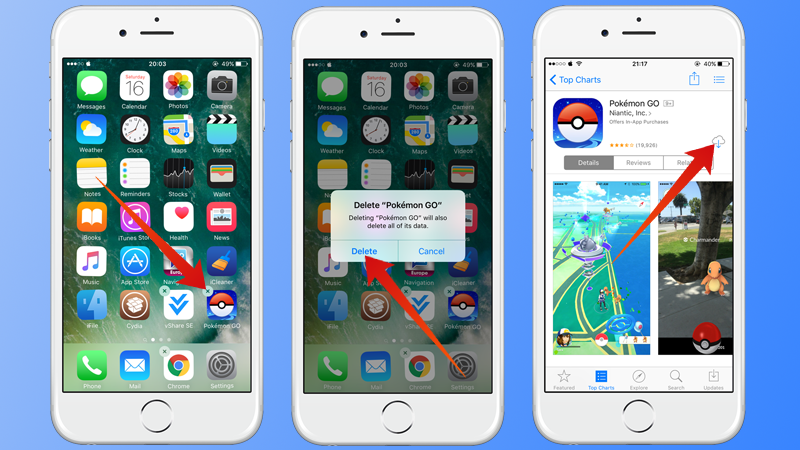
You could be using a buggy version of Pokemon Go app, as the initially released versions in fact had lots of trouble in the coding. However, the developers go these issues patched and released a bug free version in the App Store, and you might be missing out on that. Check in the App Store for an update of the Pokemon Go app. If you can’t find any, then try reinstalling the app. First uninstall the iOS app, then download and install from the App Store again.

3: Log Out and Sign In Again

If your Pokemon Go doesn’t seem to have proper connection with the server, you could try logging your user account out and re-login using your credentials. You should remember the username and passwords you have used with Pokemon Go since these might be required for errors as such.

4: Change the Network

Pokemon go not loading
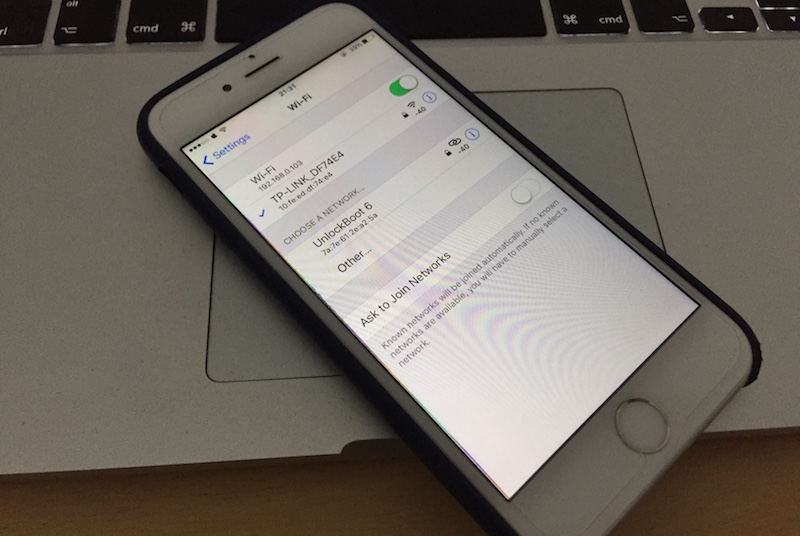
If you can’t connect to Pokemon Go while connected to a specific network, try changing the network. Try the Wi-Fi from the coffee shop across the street, or go to a mall where strong Wi-Fi coverage is provided. Or you could just ask a friend or neighbor next door, or rely on your cellphone operator’s mobile data – you’ll need that connection for Pokemon hunting anyways.

5: Reset All Settings

Pokemon go server crash
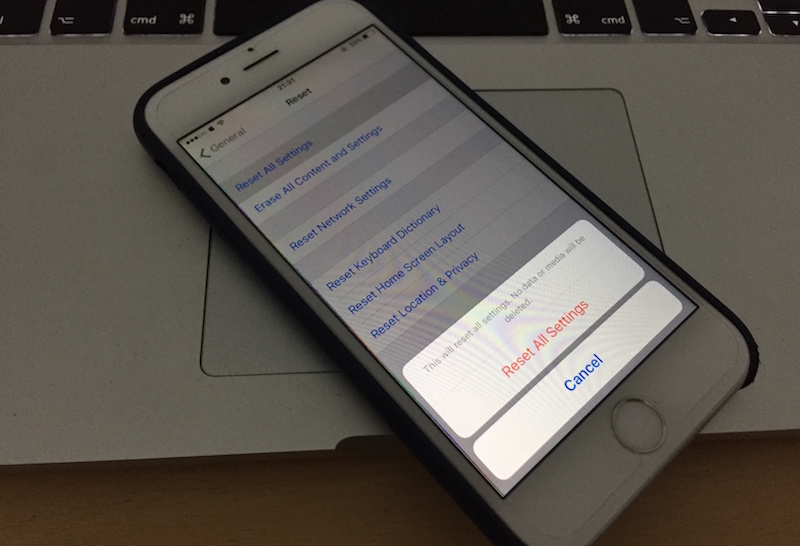
Although we wouldn’t suggest resetting the whole iPhone/iPad for playing Pokemon Go, but you could give it a try if you are a very serious Pokemon fan. To do that go to Settings – General – Reset – Reset All Settings.
Conclusion: These are the ways you could resolve issues like Pokemon Go crashing or server connection issues on an iPhone or iPad. These simple steps have proven to be effective in resolving Pokemon Go issues.
Read More

Fix iPhone 6 Plus & 6 Screen Flickering Issue

How to Fix iPhone 6 Plus / 6 Screen Flickering Issue

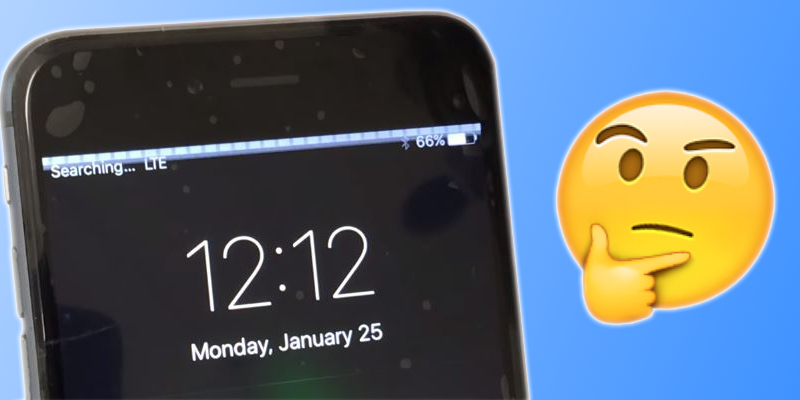
iDevices sometimes have display issues like iPhone 6 screen flickering. This is because of a faulty hardware, but there are some instances where the issue could arise because of a software glitch. This post highlights the measures you can take to resolve iPhone 6 Plus and iPhone 6 screen flickering issues, regardless of whether it is due to a software or hardware glitch.
iPhone Screen Flickering Fix

How to Fix iPhone Screen Flickering Issue

1: Switch on Reduce Transparency

Fix iPhone 6 Screen Flickering
Switch on this display feature that’s available on iOS 9 and above firmware by going to Settings – General – Accessibility – Increase contrast, and toggling “Reduce Transparency” to on.

2: Modify Screen Brightness

Adjusting screen brightness may fix the issue. Go to Settings – Display & Brightness – disable Auto Brightness, and drag the “Brightness Slider” downwards to reduce screen brightness.

3: Reboot iDevice

Fix iPhone Screen Flickering
If this is your first experience with iPhone 6 screen flickering, reboot your iPhone and see if the problem continues. Also, if the flickering occurs due to a broken Cydia tweak, hold the Power and Home button to boot into safe bode until the screen is black. Then follow these steps:
  1. Leave the Home button but continue holding the Power button.
  2. When the Apple logo appears, hold “Volume Up” until springboard shows.
  3. The iPhone will be in safe mode already if the settings menu no longer show tweaks.
  4. If the problem goes away, it was due to a broken Cydia tweak. Remove or disable that tweak.
Restart your iPhone to exit safe mode. The tweak should be in Settings menu after the exit.

4: Hard reset

This will erase all personal data, so make a backup to iCloud or iTunes. A factory reset can be done from the Settings menu.

5: Check memory

iPhone Memory Check
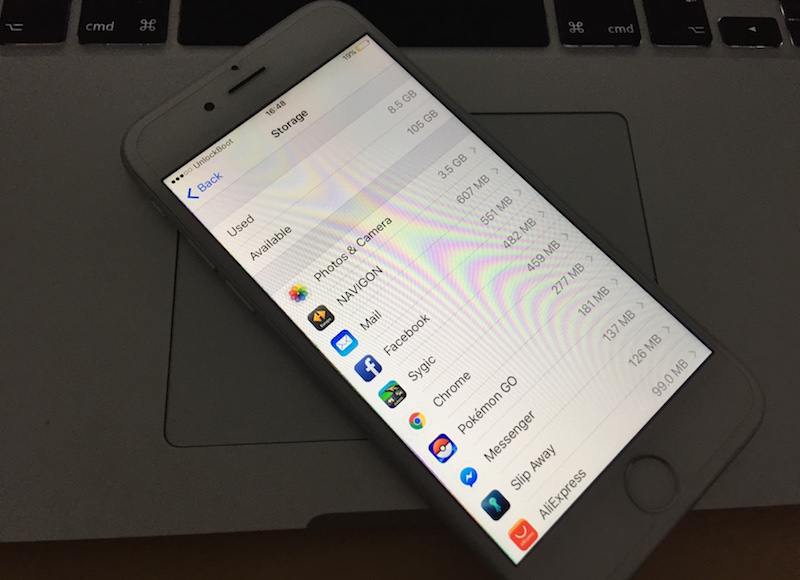
Sometimes, iPhone 6 screen flickering happens due to insufficient internal memory. Other signs of insufficient memory include unresponsive or frozen screen. If the memory is full, deleted unwanted apps to free it up.
Do this 5 things to fix the issue if it’s caused by a software glitch:
Read More