Thứ Sáu, 30 tháng 9, 2016

Read & Write Tool

Read&Write Tool is a small utility that allows you to flash IMEI on Mediatek, Spreadtrum and Qualcomm Devices (including feature phone, smartphone and tablets).
Here, we have managed to share all the available versions of Read&Write Tool including the latest version.
Read&Write Tool launched

Features of Read&Write Tool

Simple Interface
It comes with very simple interface that allows you to quickly Read the Current IMEI from your Device and Write the IMEI on your device (including single or dual IMEI).
Flash IMEI on Mediatek Device
It allows you to flash IMEI on any Mediatek FeaturePhone, Smartphone and Tablets. To flash IMEI on Mediatek Device you need to have the Database File (AP, BP) which came with the stock firmware of your device.
Flash IMEI on Spreadrum Device
It allows you to Flash IMEI on any Spreadtrum FeaturePhone, Smartphone and Tablets. You dont have to add any Database File in order to flash IMEI on Spreadtrum Devices.
Flash IMEI on Qualcomm Device
It allows you to Flash IMEI on Qualcomm FeaturePhone, Smartphone and Tablets. It doesnt require you to add any database file (AP, BP) to flash the IMEI on Qualcomm devices.
Other Features
It also allows you to flash the SN Address, APSN Address, MEID Address, Bluetooth Address and WiFi Address on your Smartphone and Tablets.

Download Read&Write Tool

Read&Write_Tool_v1.1
Read&Write_Tool_v1.3
Keep in Mind:
[*] How to use Read&Write Tool: If you want to learn how to operate the tool, then head over to How to use ReadWrite Tool to Flash IMEI.
[*] Read&Write tool allows you to flash IMEI on FeaturePhone, Smartphone and Tablets.
[*] Caution: Flashing IMEI other than the Original is Illegal in many countries. So, always try to flash the Original IMEI on your device.
[*] Credits: Read&Write Tool is create by WangWenjiang (developer). So full credits goes to him, for sharing the tool for free.
Read More

Lenovo Downloader Tool

Lenovo Downloader is a small tool that allows you to Flash Stock Firmware on Lenovo Qualcomm Smartphone and Tablets.
Here, on this page we have managed to shared the latest version of Lenovo Downloader Tool to flash the stock firmware on Lenovo Qualcomm Device.
lenovo downloader

Features of Lenovo Downloader Tool

Simple Interface
It comes with very simple interface, much similar to SPD Upgrade Tool. But Setting Panel is bit different and allows you to change the Download Settings and Chipset Number.
Flash Stock Firmware
It allows you to flash stock firmware on Lenovo Qualcomm Smartphone and Tablets. Even it is compatible with other Qualcomm Devices than Lenovo.
Download Settings
It allows you to change Multiple Download Settings from the Download Panel including eMMC Programmer, Raw Programmer, and Chipset Number.
Support Other Devices
It allows you to flash stock firmware on other Qualcomm Devices than Lenovo. Simply install the Qualcomm Driver and Load the Firmware and you are ready to flash the firmware.

Download Lenovo Downloader Tool

Lenovo_Downloader_v1.0.2
Lenovo_Downloader_v1.0.3
Keep in Mind:
[*] Works for Qualcomm Chipset Only: The above tool only works to flash Stock firmware on Lenovo devices having Qualcomm Chipset. It will not for other Lenovo Device having other chipset than Qualcomm.
[*] How to Use: If you want to learn how to flash stock firmware using the Lenovo Downloader Tool then head over to How to use Lenovo Downloader Tool.
[*] Backup before using: Take a backup of your important data from the device before using the above tool, as your files will be deleted after flashing the stock firmware.
[*] Alternative Tool: eMMC Download Tool and Qcom Phone Download Tool are the best alternative tool, that also allows you to Flash Stock Firmware on any Qualcomm Smartphone and Tablets.
[*] Credits: Lenovo Downloader Tool is created and distributed by Wingtech Shanghai. So, full credits goes to them for sharing the tool for free.
Read More

Huawei HiSuite Application

Huawei HiSuite is the official Device Manager Application made by Huawei to easily Connect your Huawei Smartphone and Tablets to the Windows Computer and Sync Data between them.
Here, we have managed to share the latest version of Huawei HiSuite Application along with the previous versions.
Huawei Hisuite

Features of Huawei HiSuite Application

App Management
It allows you to see the list of Apps installed on your smartphone and uninstall it easily. It also allows you to install 3rd party Apps on your device using the computer.
Backup and Restore
It allows you to create a backup of your important data including Pictures, Videos, Contacts, Messages and restore them later.
System Update
It allows you to update your Smartphone and Tablets directly from your computer. You dont have to download any package on your Device Separately, as HiSuite automatically detects the available update for your device and allows you to install it from your computer.
Contacts Management
It allows you to Create a New Contacts on your Device and you can also edit the existing Contacts and Delete them manually from your computer. It also allows you to import and export contacts between the computer and your device.
Pictures Management
It allows you to browse Multiple Pictures from your Device and you can easily import and export the images from your device to the computer or from computer to the device.
Video Management
It allows you to see the existing Videos on your device and easily import and export the videos from computer to the your Huawei Device.
Messages
It allows you to create new messages and send them to single or multiple recipients using your computer only. It also allows you to import and export the existing Messages between your computer and the Device.
Screenshot
It allows you to Quickly take the screenshot of your device and same them on your computer directly.

Download Huawei HiSuite Application

Huawei_Hisuite_1.8.1.260
Huawei_Hisuite_4.0.4.204
Huawei_Hisuite_4.0.5.300 – latest
Keep in Mind:
[*] Compatibility: Huawei HiSuite Application is compatible with Windows XP, Vista, Windows 7, Windows 8, 8.1 and Windows 10 Only.
[*] Huawei USB Driver: If you are looking for the official Huawei USB Driver then head over to the Download Huawei USB Driver Page.
[*] Credits: Huawei HiSuite Application is officially created by Huawei Mobile Inc. So, full credits goes to them for sharing the tool for free.
Read More

Samsung Smart Switch Application

Samsung Smart Switch Application is the successor of Samsung Kies Application which provides the same functionality of Samsung Kies with modern UI and support to almost all the latest Samsung Devices including Galaxy S7 and S7 Edge.
Here on this page, we have share the latest version of Samsung Smart Switch Application for Windows and Mac Computer.
Samsung Smart Switch

Features of Samsung Smart Switch Application

Modern UI
Samsung Smart Switch Application comes with very simple Interface and very less features than Samsung Kies Application. Firstly, you need to connect your Samsung Device to the Computer in order to use the Application completely. Then after you can see only 3 options in the main screen i.e Backup, Restore and Outlook Sync.
Easy Backup
Using this feature you can easily backup everything on your device and save it on the computer. You can backup Contacts, S Planner, Messages, Memo, Call logs, Clock, Internet (bookmarks), Images, Music, Videos, Documents, Story Album, Applications, Email, Wallpaper, Lock screen, Radio and Preferences.
To create a backup, click Backup at the bottom of the Smart Switch window. When you click the Backup button, Smart Switch immediately starts to create a backup.
Easy Restore
You can restore data from a backup created from a Samsung device easily. To restore data from a Samsung device backup, simply open the Samsung Smart Switch Application on your Computer and Click on Restore Button. Then locate the backup you have saved on your computer and then select the list of items that you want to restore and Click on restore Now button to finish.
Outlook Sync
Using this feature you can easily sync your Device Contacts, Calendar and To-Do list to your Outlook Account anytime.

Download Samsung Smart Switch Application

Smart Switch for Windows
Smart Switch for Mac OS X
Keep in Mind:
[*] Compatibility: Samsung Smart Switch Application is Compatible with Windows XP, Vista, Windows 7, Windows 8, Windows 8.1 and Windows 10 (x86 or x64 bit).
[*] Download Samsung Kies: If you are looking for the Samsung Kies Application then head over to the Download Samsung Kies Page.
[*] Samsung Stock Firmware: If you are looking for the original firmware for your device then head over to Download Samsung Stock Firmware for all devices page.
[*] Samsung USB Driver: If you are looking for the original USB Driver for your device then head over to Download Samsung USB Driver for all devices page.
[*] Credits: Samsung Smart Switch Application is created by Samsung Mobility LLC. So, full credits goes to them for sharing the application for free.
Read More

Qualfast Tool

Qualfast Tool is a small application that allows you to flash stock firmware on any Qualcomm Device (smartphone and tablets). Here, on this page we have managed to re-designed and share the fresh version of Qualfast Tool that supports Windows XP, Windows Vista, Windows 7, Windows 8, 8.1 and Windows 10.
Qualfast Tool

Features of Qualfast Tool

Simple Interface
Qualfast comes with very simple user interface. Unlike other Qualcomm flashing tools, it comes with very few options only. You can add the firmware using the SEL PATH button and to begin the Flashing click on OK, or Stop or Cancel using the specific buttons.
Easy to Use
Using Qualfast Tool is Quite easy. Simply Click on SEL PATH Button to Locate the Firmware Folder on your computer and Click on OK Button to Begin the Flashing.
Supports Qualcomm Devices
It allows you to flash stock firmware on any Qualcomm Smartphone and Tablets. If you are willing to flash stock firmware on other than Qualcomm Chipset then it may not work for you.

Download Qualfast Tool

Qualfast_v1.0.1
Qualfast_v1.0.2
Keep in Mind:
[*] Compatibility: Qualfast is compatible with Windows XP, Windows Vista, Windows 7, Windows 8, Windows 8.1 and WIndows 10 (x86 or x64 bit).
[*] How to Use: If you want to learn How to use Qualfast to Flash Stock Firmware on your Qualcomm Device then head over to How to use Qualfast Application Page.
[*] Caution: Take a backup of your important data before using the Qualfast Tool, as because your personal data will be deleted after flashing the stock firmware with Qualfast Tool.
[*] Alternative Tools: We have also shared other tools that also allows you to flash stock firmware on Qualcomm Devices including Qcom Phone Download Tool, GNQC Download Tool and eMMC DL Tool.
[*] Credits: Qualfast is re-designed and developed by AndroidMTK.com Team. If you wish you can share it on any website or forums with proper credits.
Read More

Smart Phone Upgrade TooL

Smart Phone Upgrade Tool is a small application that allows you to flash stock firmware on your Qualcomm Smartphone and Tablets. Here, on this page you will find the latest version of Smart Phone Upgrade Tool and the previous versions.
Smart Phone Upgrade Tool

Features of Smart Phone Upgrade Tool

Installable Application
SmartPhone Upgrade Tool comes as a setup file, which means you need to install it first on your computer then only you will be able to use it properly.
Easy to Use
It allows you to easily load the Qualcomm based stock firmware (.xml) on the tool and flash it on the Smartphone and Tablets easily in few clicks only.
Refresh Port
It comes with a Refresh Port Button, which allows you to automatically detect the connected Qualcomm smartphone and Tablets without restarting the application.
Supports Qualcomm Devices
It allows you to flash stock firmware on Qualcomm Smartphone and Tablets Only. It doesnt support the devices having other chipsets than Qualcomm.

Download Smart Phone Upgrade Tool

SmartPhone_Upgrade_Tool_v1.5.1.zip
SmartPhone_Upgrade_Tool_v1.5.3.zip
Keep in Mind:
[*] Compatible With: It is compatible with Windows XP, Windows Vista, Windows 7, Windows 8, Windows 8.1 and Windows 10 (x86 or x64 bit).
[*] How to Use: If you want to learn How to use Smartphone Upgrade Tool then head over to the How to use Smartphone Upgrade Tool Page.
[*] Caution: Take a backup of your important data before using the Smartphone Upgrade Tool, as your personal data will be deleted after flashing the stock firmware using Smartphones Upgrade Tool.
[*] Alternative: There are several alternative applications are available that allows you to flash stock firmware on Qualcomm Devices including Qualcomm Flash Image Loader, Qualfast, Qcom Phone Download Tool, eMMC DL Tool, GNQC Download Tool and Xiaomi Mi Flash Tool.
[*] Credits: Smart Phone Upgrade Tool is created and distributed by Qualcomm Mobility LLC. So, full credits goes to them for sharing the application for free.
Read More

Motochopper Tool

Motochopper is a small utility that allows you to root your Android Device running from Android 2.3 to Android 4.2. Here, on this page we have managed to share the latest version of Motochopper Tool along with the previous release.
Motochopper Tool

Features of Motochopper Tool

Portable Application
It comes as a portable application that doesnt need to be install in order to use it. Simply open run.bat file to open the application and you are ready to use it.
Simple Interface
Motochopper is built on Command Window, which makes the interface similar to Windows Command Prompt. And in many case you will find it better and simple to use it.
Support Android 2.3 to Android 4.2
It allows you to root your Android device running from Android 2.3 to Android 4.2 in few clicks only. It doesnt allows you to root devices running from Android 4.3 to 7.0.
Works Offline
In order to use the Application, you dont need to have active internet connection to root your device. Simply launch the application and follow the screen instructions to root your device.
Compatibility
You can use Motochopper Tool on Windows XP, Windows Vista, Windows 7, Windows 8, Windows 8.1 and Windows 10 (x86 or x64 Bit computer).

Download Motochopper Tool

Motochopper_v1.0
Motochopper_v1.1
Password to extract: androidmtk.com
Keep in Mind:
[*] For Android 2.3-4.2 Only: It only allows you to root the Android device which is running on Android 2.3 to Android 4.2. It will not work on the devices which are running from Android 4.3 to Android 7.0.
[*] No data loss process: If you are going to try Motochopper Application to root your android device then your personal data will not be affected in anyway.
[*] Warranty Void: Rooting your Android Device will void the device warranty. And you may not able to reclaim the device warranty even after unrooting.
[*] Credits: The Motochopper tool was provided by Dan Rosenberg (XDA Developer). So, full credits goes to him for creating and sharing the tool.
Read More

SP Meta Tool

SP Meta Tool is a small application that allows you to perform multiple tasks on your Mediatek FeaturePhone, Smartphone and Tablets. Here, on this page you will find the latest version of SP Meta Tool along with the previous releases.
SP Meta Tool

Features of SP Meta Tool

Installer Application
SP Meta Tool comes as a installer file, which means you need to install it first on your computer then only you will be able to use it properly.
Flash IMEI
It allows you to flash IMEI or repair IMEI on any Mediatek smartphone and tablets. During the flashing process you will be asked for database files which came along with the stock firmware.
Restore IMEI
It allows you to backup IMEI from any Mediatek smartphone and tablets. You can restore the backup IMEI very easily using the same method.
Repair NVRAM
It allows you to flash or repair the NVRAM of your Mediatek Featurephone, Smartphone and tablets.
Supports Mediatek
It only supports Mediatek featurephone, smartphone and tablets. It will not work on devices having chipsets other than Mediatek.

Download SP Meta Tool

SP_Meta_v1.1512.0
SP_Meta_v1.1544.0
SP_Meta_v1.1620.0
SP_Meta_v1.1628.0
SP_Meta_v6.1051.0
SP_Meta_v6.1316.1
SP_Meta_v7.1408.1
SP_Meta_v7.1420.1
SP_Meta_v7.1436.1
SP_Meta_v7.1444.0
SP_Meta_v9.1604.2
Keep in Mind:
[*] Compatibility: It is compatible with Windows XP, Windows Vista, Windows 7, Windows 8, Windows 8.1 and Windows 10.
[*] How to use: If you wish you learn How to use SP Meta Tool to flash IMEI on your Mediatek Device.
[*] Caution: Flashing IMEI other than the original is illegal in many countries and may cause serious trouble to you, so Beware. We recommend you to flash the same IMEI that comes with the device.
[*] Alternative Tool: You can use SN Write Tool to flash or repair IMEI on your Mediatek smartphone and tablets.
[*] Credits: SP Meta Tool is created and distributed by Mediatek Inc. So, full credits goes to them for sharing the tool for free.
Read More

Sugar MTK SP Flash Tool

Sugar MTK SP Flash Tool is a small application that allows you to flash stock firmware on any Mediatek FeaturePhone, Smartphone and Tablets. Here, on this page we have managed to share the working version of Sugar MTK SP Tool that allows you to perform multiple tasks.
Sugar MTK SP Flash Tool

Features of Sugar MTK SP Flash Tool

AutoInstaller
Sugar MTK SP Tool comes as autoinstaller which means in order to use the application, you have to install the application on your computer.
Inbuilt MTK Driver
After completing the initinal Setup of Sugar MTK SP Tool on your computer, you will be asked to install the MTK Drivers at the Last of Setup. Simply, Tick Install Driver and Click on Finish Button.
Auto Update
After completing the initial setup of Sugar MTK SP Tool on your computer, when you launch the tool then you will get notification whether any new version of tool is available or not.
Noticeable Features
It allows you to download from GUTO server or Local computer, Download from Local computer with dongle authentication, Multithreaded Download, support change CU-REF, Support building root record, support emergency download CU-REF.

Download Sugar MTK SP Flash Tool

Sugar_MTK_SP_V3.5.8_Setup
Keep in Mind:
[*] Compatibility: It is compatible with Windows XP, Windows Vista, Windows 7, Windows 8, Windows 8.1 and Windows 10.
[*] How to use: If you wish you can learn How to use Sugar MTK SP Flash Tool to flash stock firmware on your Mediatek Devices.
[*] Username and Password: Sugar MTK SP Tool requires username and password to login before using. Use the following Info: Username: SU_IN.Panasonic Password: KoD8naL2 to Login.
[*] Alternative Tool: You can use SP Flash Tool or SPMDT Flash Tool to flash stock firmware on any Mediatek Smartphone and Tablets.
[*] Credits: Sugar MTK SP Flash Tool is created and distributed by TCT Mobile INC. So, full credits goes to them for sharing the tool for free.

Read More

DFU Flash Tool

DFU Flash Tool is a small utility that allows you to flash stock firmware on any Broadcom Smartphone and Tablets. Here, on this page we have managed to share the official DFU Flash Tool which allows you to perform multiple tasks on your Broadcom Device.
DFU Flash Tool

Features of DFU Flash Tool

Portable Application
It comes as a portable application, which means you can use the application without installing it on your computer. Simply Download the Tool and extract it on your computer, then click on dfu.exe to launch it.
Multiple Mode
It support multiple modes to flash the stock firmware on your Broadcom Device including Simple Download Mode, Calibration Mode and Loader Mode.
Multiple Device Support
It allows you to flash stock firmware on Multiple Broadcom Device at the same time. To Use: Tick the Multiple Devices and Select the Number of devices using Columns and Rows.
Advanced Options
It came with advanced features including ADB Fastboot Protocol, BootUSB Mode, Password Protection to protect settings and console tab, Calibration Mode after Download, Restarting device after flashing, Athena/21553 support, Generate Debug logs, Play sound after flashing, Turn off the device and Stress Test.

Download DFU Flash Tool

DFU_Flash_Tool_v2.01.zip
DFU_Flash_Tool_v2.03.zip
Keep in Mind:
[*] Compatibility: It is compatible with Windows XP, Windows Vista, Windows 7, Windows 8, Windows 8.1 and Windows 10.
[*] How to use: If you wish you can learn How to use DFU Tool to flash stock firmware on any Broadcom Device.
[*] Download Broadcom Driver: DFU Tool works perfectly with the official Broadcom USB Driver, which can be downloaded from here.
[*] Alternative Tool: Broadcom MultiDownloader is the best alternative to DFU Tool that allows you flash stock firmware on any Broadcom Device.
[*] Credits: DFU Flash Tool is created and distributed by Broadcom INC. So, full credits goes to them for sharing the tool for free.
Read More

Infinix Flash Tool

Infinix Flash Tool is a small application that allows you to flash stock firmware on any Mediatek Smartphone and Tablets. Here, on this page we have managed to share the latest version of Infinix Flash Tool along with the previous releases.
Infinix Flash Tool

Features of Infinix Flash Tool

Portable Application
It comes as a portable application, which means it doesnt need to be installed on the computer to use it. Simply extract the downloaded package and open flash_tool.exe to launch it.
Simple Interface
It comes with very easy interface and less buttons to get confused with. On the main panel there is only three buttons available i.e Browse, Start and Stop. Browse button allows you to add the Scatter file, Start Button allows you to begin the flashing process and using the Stop Button you can Stop the flashing process anytime.
Flash Stock Firmware
It allows you to flash stock firmware on any Mediatek Feature Phone, Smartphone and Tablets in a click only. Simply, load the scatter file using the browser button and click on start button to begin the flashing process.
CDC and VCOM Compatible
It supports Android CDC and Android VCOM drivers to flash the stock firmware on Mediatek Device. You need to install either CDC or VCOM Driver on your computer to get your device detected by the Infinix Flash Tool.

Download Infinix Flash Tool

Infinix_Flash_Tool_V1.0
Keep in Mind:
[*] Compatible With: It is compatible with Windows XP, Windows 7, Windows 8, Windows 8.1 and Windows 10 (supports x32 and x64 bit).
[*] How to Use: If you wish, you can learn How to use Infinix Flash Tool to flash stock firmware on any Mediatek FeaturePhone, Smartphone and Tablets.
[*] Alternative Application: SP Flash Tool is the best alternative available, which came with advance features including Flashing Mode, Recovery Flashing, Memory testing, Parameter Settings etc.
[*] Credits: Infinix Flash Tool is created and distributed by Infinix Mobility, LLC. So, full credits goes to them for sharing the application for free.
Read More

SUT L3 Tool (software update tool)

SUT L3 Tool (software update tool) is a small application that allows you to flash stock firmware on any Intel Chipset Based Smartphone and Tablets. Here, on this page we have managed to share the latest version of SUT L3 Tool along with the previous releases.
SUT L3 Tool

Features of SUT L3 Tool

Installer
It comes as Installer package, which means you need to Install it on the Computer first in order to use it properly.
Simple Interface
It comes with a simple and user friendly interface which allows you to quickly load the stock firmware in the tool and flash it on your device. You can also follow How to use SUT L3 to flash stock firmware on any Intel Device.
Inbuilt Drivers
It comes with all the required USB drivers along with the setup file, which automatically get installed on the computer with SUT L3 Tool. But if in case, you want to uninstall the SUT L3 Tool from your computer then Drivers will not be removed automatically. You can remove or uninstall the Drivers manually from Windows Uninstall programs Menu.
Supports nb0 or ffu extension
It supports all types of Intel Firmware which comes with NB0 and FFU extension. It may not support other Intel firmware which came with extension other than nb0 or ffu.

Download SUT L3 Tool

SUTL1 v3.1.8
SUTL3 v1.7.2
SUTL3 v2.1.1
SUTL3 v3.1.4
Keep in Mind:
[*] Compatibility: It is compatible with Windows XP, Windows Vista, Windows 7, Windows 8, Windows 8.1 and Windows 10.
[*] How to Use: If you wish you can learn How to use SUT L3 Tool to flash stock firmware on any Intel Device.
[*] Backup: Take a Phone backup before using the Software Update Tool (SUT l3) as because during the flashing process your personal data will be removed.
Credits: SUT L3 Tool is created and distributed by Intel, LLC. So, full credits goes to them for sharing the tool for free.
Read More

Qualcomm Flash Image Loader FULL (QFIL)

Qualcomm Flash Image Loader (QFIL) is a small application that allows you to flash stock firmware on Qualcomm Smartphone and tablets. Here on this page we have managed to share the latest version of Qualcomm Flash Image Loader application which supports Windows XP, Windows Vista, Windows 7, Windows 8, Windows 8.1 and Windows 10.
Qualcomm Flash Image Loader QFIL

                                               download______________________


 Features of Qualcomm Flash Image Loader (QFIL)

Portable Application
QFIL comes as a portable application which means you dont have to install it on your computer in order to use it. Simply Download and extract the application and open QFIL.exe to launch it, and you are ready to use.
Easy to Use
It allows users to easily load the Qualcomm based stock firmware (.mbn) on the tool and flash it on the Smartphone and Tablets easily in one click.
Log Box
If you are flashing the stock firmware using QFIL then you can see the complete log in the log box of the application. Which will help you to investigate the errors, if you got any.
Supports Qualcomm Chipset
QFIL only supports smartphone and tablets which are having Qualcomm Chipsets only. It will not work the devices having other chipsets than Qualcomm.

Download Qualcomm Flash Image Loader (QFIL)

Qualcomm_Flash_Image_Loader_v1.0.0.3
Keep in Mind:
[*] Compatible With: It is compatible with Windows XP, Windows Vista, Windows 7, Windows 8, Windows 8.1 and Windows 10 (x86 or x64 bit).
[*] Caution: Take a backup of your important data before using the QFIL Application, as your personal data will be deleted after flashing the stock firmware using QFIL Application.
[*] Alternative: There are several best alternative tools are available that allows you to flash stock firmware on Qualcomm Devices including Qualfast, Qcom Phone Download Tool, eMMC DL Tool, GNQC Download Tool and Xiaomi Mi Flash Tool.
[*] Credits: Qualcomm Flash Image Loader is created by Qualcomm Mobility LLC. So, full credits goes to them for sharing the application for free.
Read More

Thứ Năm, 29 tháng 9, 2016

Unlock iPhone Passcode Without iTunes Restore

Unlock iPhone Passcode Without iTunes Restore

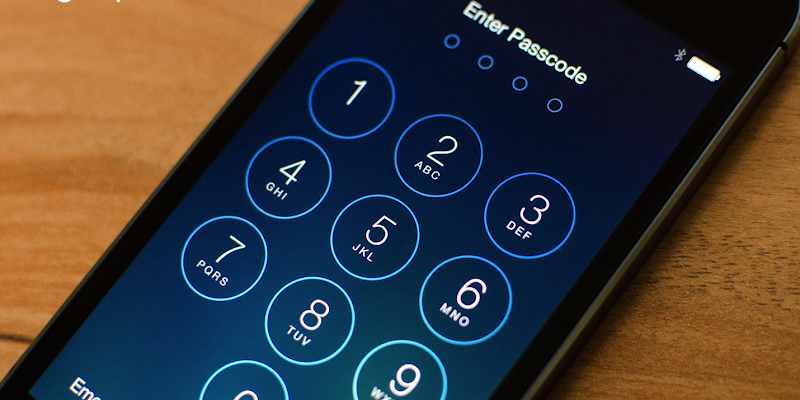
If you have forgotten the passcode or the pin code of an iPhone’s lock screen, and can’t really afford time to get past the barrier using some other method going to an Apple store and verifying that it’s actually your phone and not someone else’s, you could try these simple hacks to bypass iPhone lock screen that will help you to unlock iPhone passcode.
Unlock iPhone Passcode

How to Unlock iPhone Passcode Without Restore

These simple hacks are usually hidden inside the iOS system, and someone on the internet has exploited the settings for everyone. However, there are three tricks here and all of them require the use of a computer (use this method if you want to Sign In to iCloud from iPhone). iTunes and iCloud access will be required on a Mac, or PC.

#1: Unlock iPhone Passcode using iCloud

Bypass iPhone Passcode
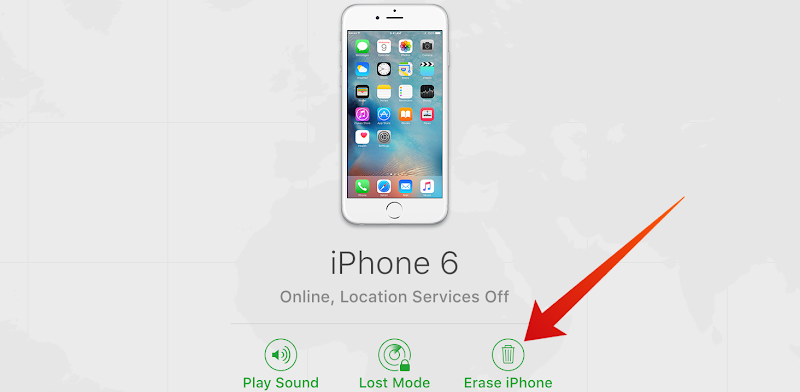
Erase iPhone via iCloud control panel
To restore an iPhone from malfunctioning state and unlock the passcode, using this method is particularly very useful (use this method if your iPhone is disabled). iOS devices are equipped with amazing features, and the security of user’s data and information stored on a device are remarkable among those. If an iPhone is lost or stolen, a user can remotely wipe their phone, and turn the phone into a brick by marking it lost on iCloud. However, even without losing your iPhone you could bypass the lock screen on your device using iCloud. Internet access is required. Find My iPhone should also be enabled beforehand, otherwise this method might not work.
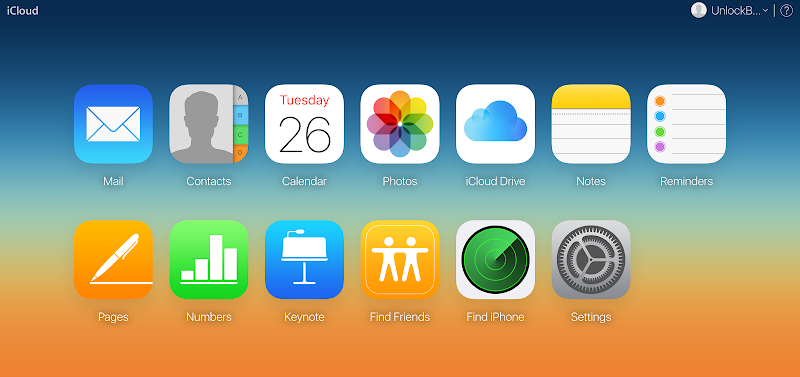
  1. Using the web browser on your computer, go to iCloud.Com.
  2. Upon launching of the page, insert your login credentials e.g. username and password on the login page. Make sure you have used appropriate credentials, otherwise logging in won’t be done.
  3. Once logged in, all the devices incorporated with the iCloud account you have logged in with will be shown on screen. Find out the device you are having trouble with. There are options next to the devices, about what you want to do with it.
  4. Click on Erase operation for the device which you can’t log in to. The device will be wiped.
  5. Once your device is wiped, it will start up as a fresh device. Set it up using the same iCloud username and password again.
  6. Initiate a restore operation for your iPhone that you have just restored. The process will take some time, depending on how big of a backup you had stored before initiation of the process.
Now you can set up a new passcode or use fingerprint to lock the device.

#2: Unlock iPhone Passcode using iTunes Backup

To bypass / unlock iPhone passcode, the following steps need to be done:
  1. Connect your iOS device to a trusted computer, like you normally would. Wait till the iPhone syncs up with iTunes and all the data stored on the device is saved on the PC as well.
  2. Since now you have the latest backup stored on your computer, you can hit the restore option on iTunes.
  3. After the data erase is complete, the phone will boot up. Set it up using the previous username and password.

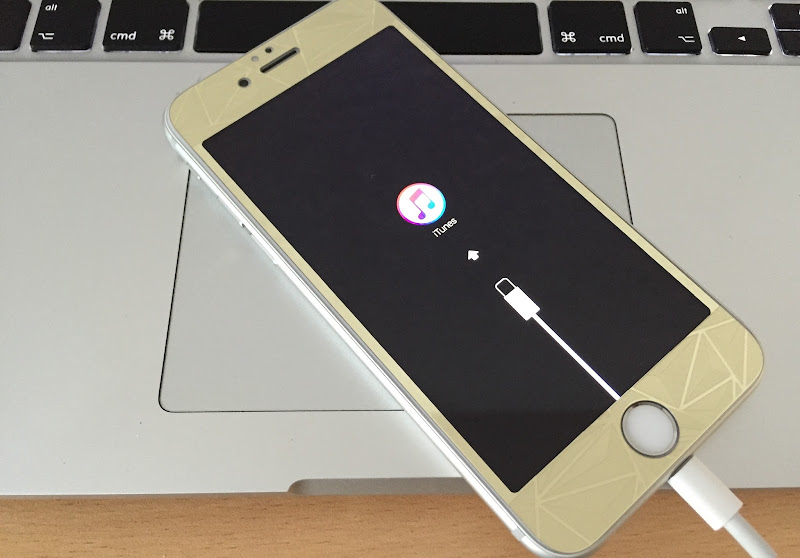
#3: Use Recovery Mode to Unlock iPhone Passcode

unlock passcode iphone 6
iPhone in Recovery mode connected to iTunes
  1. This method can get little tricky, if possible get someone else as well.
  2. Turn the phone off. Press and hold the home and power button together while connecting the lightning cable to the PC at the same time. That’s where another hand could make the work easier.
  3. Until ‘Connect to iTunes’ appear on screen, don’t let the Home button go. When it does, release the Home button. iTunes will detect a device.
  4. Erase and Restore your iPhone using the same method.
You're Done!
Conclusion: Hopefully, you have understood how these three steps are done. If you can’t, consulting the Apple customer support might be a better idea.
Read More

Restore iPhone Without iTunes

How to Restore iPhone Without iTunes

Restore iPhone Without iTunes

Backup and Restore iPhone without iTunes

Following are the methods how an iPhone user can manually backup their data on iCloud servers, and restore iPhone without iTunes or without Computer. Though the whole procedure is done through Apple official methods, yet the involvement of iTunes is not necessary at all.
iCloud Website Content

iCloud Backup Contents

If you are doubtful about what gets backed up on iCloud servers, then the following list should be able to mitigate all your confusions. Basically, the iCloud servers back up a whole lot of user behavior and interaction records with the iPhone and the user data. These include the following items:
  • The settings of the device.
  • iTunes purchase history for movies, TV shows, music, apps and books etc.
  • Photos and videos that are uploaded to the iCloud Photo Library.
  • The backup also includes the app organization on home screen and App data.
  • All sorts of messages like SMS, MMS, iMessage etc.
  • Settings like current ringtone, alert tones, message tone etc.
  • If you use the Health app and a Homekit or Apple Watch, data for those would be stored in the Backup and will be synced as well.
Restore iPhone from iCloud

How to Backup iPhone Without iTunes

Before you being, make sure the iPhone or iPad you are working on is connected to Wi-Fi. Mobile data shouldn’t be the primary method of internet communication here, because that might end up incurring unusual data costs. However, once you are connected to the internet, follow the steps below to create a fresh iCloud backup:
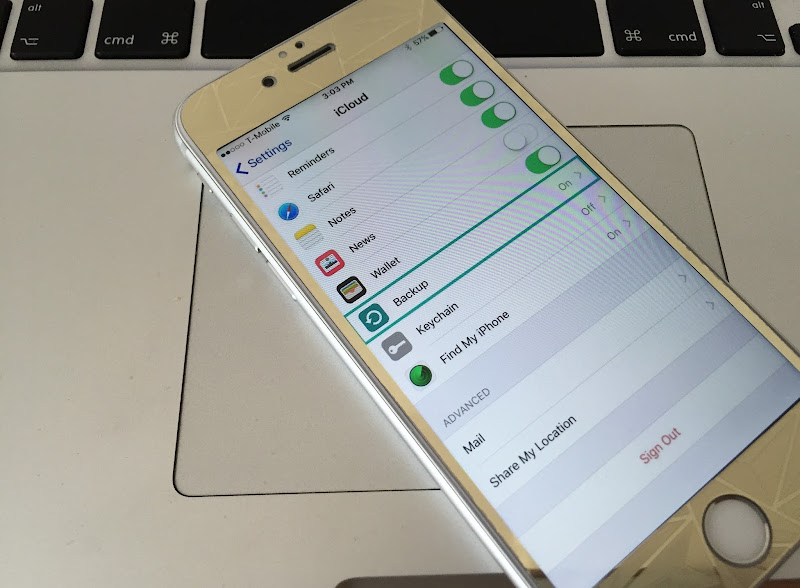
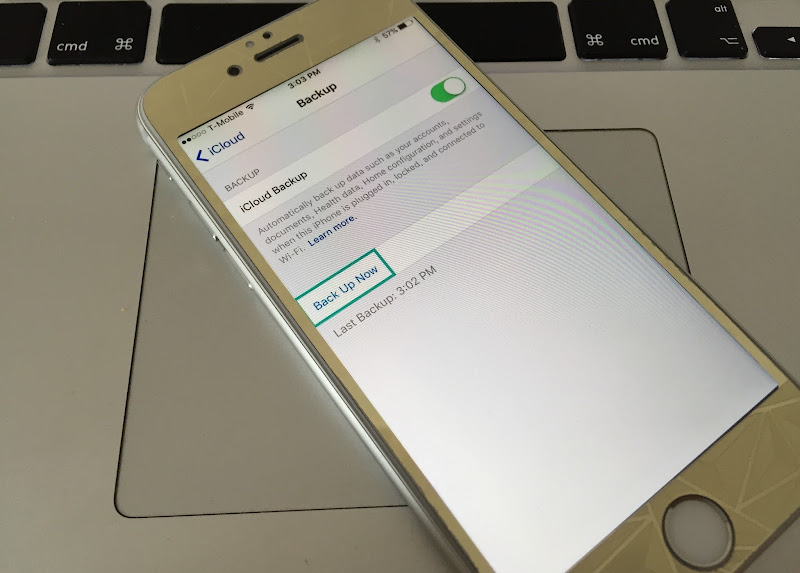
  1. Launch Settings and go to iCloud -> Backup.
  2. Inside the Backup window, tap on ‘Back Up Now’ at the bottom of the screen.
  3. Leave your iPhone connected until the backup process is completed.
Backup iPhone without iTunes
The backup will take some time to happen, and to upload to the iCloud server.

How to Restore iPhone Without iTunes

The restore your iPhone without iTunes, the operation should be performed after a full erase of the device is done. To restore iPhone without iTunes or Computer follow the steps below:
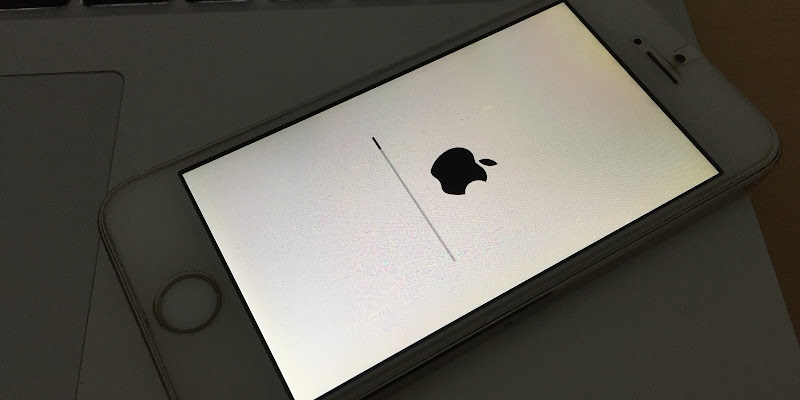
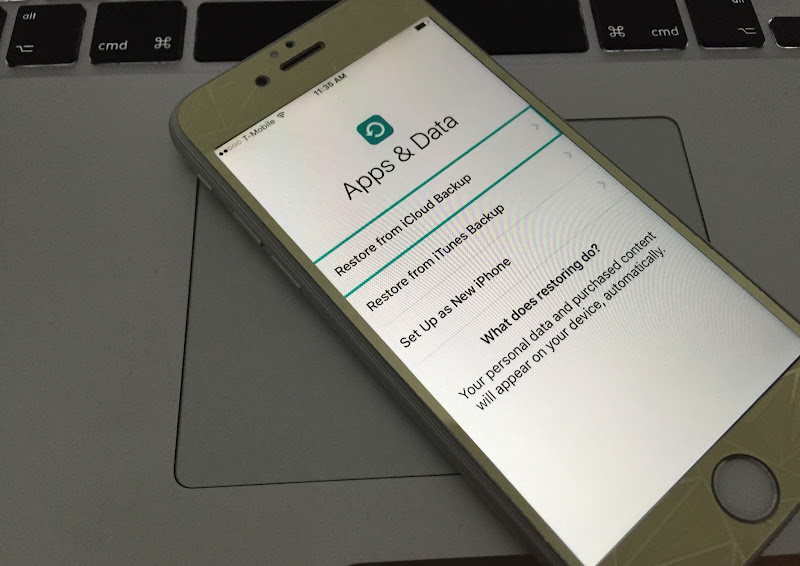
  1. When the iPhone is booting up after a reset, two backup options should show up under the screen ‘Apps & Data’.
  2. Tap on ‘Restore from iCloud Backup’.
  3. Log in to iCloud using your previous iCloud credentials, and the iPhone will begin downloading the last stored iCloud backup.
  4. Select a specific backup and wait for the restore process is completed.
restore iPhone without computer
Conclusion: Backup and Restore iPhone without Computer or iTunes - through iCloud servers is a highly useful option on the iOS platform. People who switch devices very often or live in a potential risk of their devices getting lost could be greatly helped by this feature.

khôi phục iphone không cần máy tính và itunes 
trước hết bạn cần sao lưu lại dự liệu bằng cách:
 vào cài đặt
tiếp đến chọn mục icloud
chọn mục sao lưu nhấn vào
chọn sao lưu ngay 
sao lưu thành công , xong bước đầu tiên.

 kế tiếp, là bước khôi phục dữ liệu ngay cả khi không có máy tính, itunes.
vì bất cứ lý do gì , ví như : xóa nhầm ảnh, phim, ,....... chúng ta đều có thể khôi phục lại ngay trên chinh chiếc iphone của mình.

cách 1.
vào địa chỉ icloud.com trong trình duyệt rồi đăng nhập toài khoản icloud của bạn. sau đó chọn mục xóa iphone. vậy là chiếc iphone trở về mặc định. không còn bất cứ dữ liệu gì.
nếu muốn bạn se khôi phục lại dữ liệu đã mất  trong lúc này. đầu tiên chọn:
 ngôn ngữ > vùng > wifi > nhập tài khoản > thiết lập mới hoặc khôi phục từ bản sao lưu > chọn khôi phục lại > đợi quá trình khôi phục sử lý xong nhấn bắt đầu sử dụng iphone > xong
chiếc iphone đã trở về trang thái ban đầu cùng với dữ liệu có trước đó.

cách 2.
cách này ta xóa ngay trong máy.
đầu tiên vào: cài đặt > cài đặt chung > xóa toàn bộ iphone > nhập tài khoản icloud nếu máy yêu cầu >chọn xóa ngay. đợi một lúc chiệc iphone sẽ tự động xóa dữ liệu có trong máy và tất cả cài đặt.
sau khi quá trình hoàn thành ta tiến hành cài đặt ban đầu cho iphone :
chọn ngôn ngữ >  vùng > wifi >  thiết lập mới hoặc khôi phục từ bản sao lưu > chọn khôi phục lại > đợi quá trình khôi phục sử lý xong nhấn bắt đầu sử dụng iphone > xong


Read More

Free Up RAM Memory on iPhone

How To Clear & Free Up RAM Memory on iPhone

Is your iPad or iPhone slowing down or appearing slugging after you use it for a while? Perhaps you need to learn how to free up RAM on iPhone. While iOS does a great job at managing the memory packed into its shipped devices automatically, there are occasional hiccups, as with every other software out there.
Free Up RAM Memory on iPhone
Restarting the device usually removes these issues until the next time, but some find that process to slow. Luckily, there’s a quick method to flush the iOS device’s RAM so you can get the speed of your tablet or iPhone up again. This post will teach you how to free up RAM on iPhone step-by-step.

How to Clear iPhone Ram Memory

Clear iPhone Ram Memory
The steps to free up RAM space on iDevice is different to hard or soft reboot, and it is useful especially for old-generation iDevices with 1 GB or less RAM running the latest versions of iOS firmware.
  1. To start, hold down the Power button on your iDevice till you see the message “slide to power off” on the screen.
  2. Don’t cancel, and avoid sliding the button to switch off the device.
  3. After the “slide to power off” message appears on the screen, release the Power button, and hold down the Home button for a few seconds until the screen flashes black and go back to the Home screen.


 xóa ram iphone đơn giãn không ngờ
không cần nói nhiều chúng ta đi vào thực hiện luôn. bạn sẽ bất ngờ vì nó quá đơn giãn đến không ngờ. không cần bất cứ thiết bị nào phụ trợ , trên tay là chiếc iphone và làm thôi.

1. nhấn giữ nốt nguồn một lúc, đợi cho đến khi thanh tắt nguồn xuất hiện.
2.  nhấn giữ phím home một lúc, cho tới khi nào máy không còn hỏi tắt nguồn nữa là được.

vậy là xong , chiếc iphone của bạn đã được xóa ram , iphone sẽ mượt hơn  chạy nhanh hơn một chút. đơn giãn phải không nào.  chúc các bạn luôn có một chiếc iphone hoạt động tốt.
Read More

Thứ Tư, 28 tháng 9, 2016

Charge iPhone Faster With a Simple Method

How to Charge iPhone Faster With a Simple Method

The iPhone’s battery is better than it was ever as new models are released. However, there are still times when battery drainage is unwelcoming, and it makes you desperate to charge your handset as soon as possible. That’s why people want to know how to charge iPhone faster.
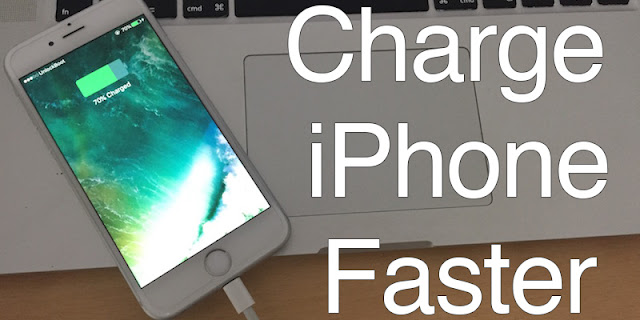
Charge iPhone Faster

3 Simple Methods to Charge iPhone Faster

Common ways of charging faster includes turning off notifications, reducing screen brightness, and switching off the device. However, there are hidden tricks that tell you how to charge your iPhone faster. Here’s what you can do.

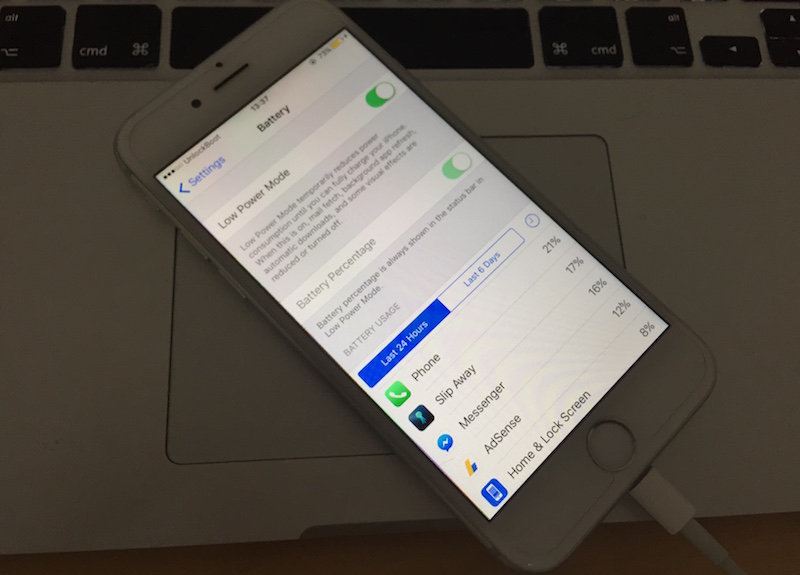
1: Switch on Low Power Mode & Connect to the Charger

Charge iPhone 6 Faster
The battery saving feature isn’t only useful for saving battery when it’s low, it’s handy for emergency charging, as well. It shuts of tasks that take a toll on your processor such as visual effects. Low Power Mode reduces the power consumption of the screen.

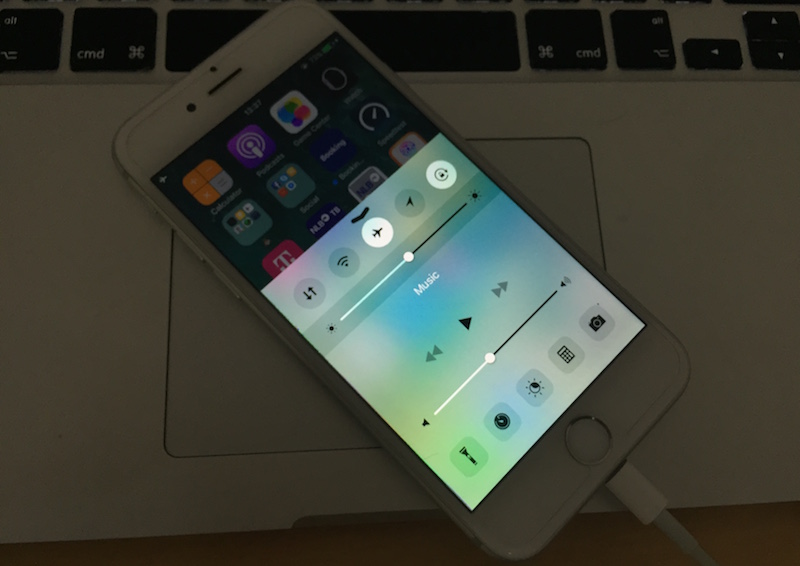
2: Switch on Airplane Mode & Start Charging

Charge iPhone battery Faster
This is the common answer to how to charge iPhone faster. As we know that Bluetooth, WiFi and 3G takes a toll on our battery life, switching them off reduces the constant strain on your iPhone, allowing it to charge a lot quicker. Yes, you’d have to sacrifice connectivity for a little while, but the phone will charge a lot faster, and you can then turn off Airplane mode again to enjoy streaming videos, downloading apps, etc.

3: Instead of using an iPhone charger, use the iPad charger

There are 3 types of USB chargers provided by Apple. The large 12W USB charger, the 5W fixed pin charger, and the 5W foldable plug charger. The most powerful one is the 12W one, and it should be. While originally released for the iPad Pro and iPad, you can always use it to charge your handset. In fact, you’ll be shocked to see how quickly your iPhone chargers, and perhaps start using it on a regular basis.
Extra tip: Make sure you use an original certified usb cable. If you use a cheap copy, your iPhone will not charge or it will charge very slowly.
See if these tips work for you and interact with us in comment.


mẹo sạc nhanh iphone đơn giãn 
bạn chuẩn bị đi đâu cần dùng đến điện thoại mà khi cầm đến điện thoại thì máy lại báo pin yếu (pin nhanh hết là vấn đề muôn thủa của iphone). vậy chúng ta phải làm sao ?

có 3 phương pháp tối ưu hóa việc sạc cho chiếc iphone của bạn. giảm thiểu tối đa thời gian sạc của bạn tới mức ngắn nhất có thể. đó là :

1. chuyển qua  chế độ tiết kiệm pin. ở chế độ này điện thoại sẽ hoạt động sao cho tiêu thụ lượng điện năng thấp nhất có thể, mà vẫn đảm bảo liên lạc.
2. chuyển chế độ bay trong chế độ này chiếc iphone sẽ không còn có thể kết nối liên lạc được nữa.
3. sử dụng sạc ipad cho iphone. cách này hiệu quả nhất mà vẫn đảm bảo kết nối thông suốt.
4. tắt thoát các ứng dụng không cần thiết, tắt kết nối 3G, LTE nếu không sử dụng, giảm chế độ sáng tối thiểu. ngừng bluetooth, chia sẽ kết nối mạng cũng nên ngừng.
5. sử dụng sạc + cáp chuẩn . điều này có thể các bạn không để ý, nhưng hiệu quả thì không phải bàn tới
6. tắt nguồn iphone và sạc. điều này khá bất tiện , nhưng hiệu quả đạt được là cao nhất trong những phương pháp được nêu. vì khi đó chiệc iphone không tiêu hao điện năng cho bất cứ hoạt động nào.

đó là những phương pháp sạc nhanh cho bạn . bạn có thể thấy phương pháp naò phù hợp nhất thì áp dụng cho mình. trong từng trường hợp và hoàn cảnh khác nhau.
áp dụng được tất cả những phương pháp này thì có thể chắc chắn rằng thời gian sac của  bạn chỉ còn khoảng 1/2.
Read More

Fix Can't Get Mail - The Connection to the Server Failed

Fix Can't Get Mail - The Connection to the Server Failed

iOS platform comes with a default mailing app, goes by the most generic name ‘Mail’. This POP3 based emailing client can log in to pretty much any popular email service out there and put all the emails in a single app platform, which should increase the productivity on user’s end. The first Mail app was showcased by Steve Jobs in 2007 while the first iPhone was introduced to the world, later on 2010 iPad first got the Mail app. Ever since the Mail app has never really disappeared from any device that runs iOS – iPhones, iPads and iPod Touch devices.
Fix Cannot Get Mail on iPhone
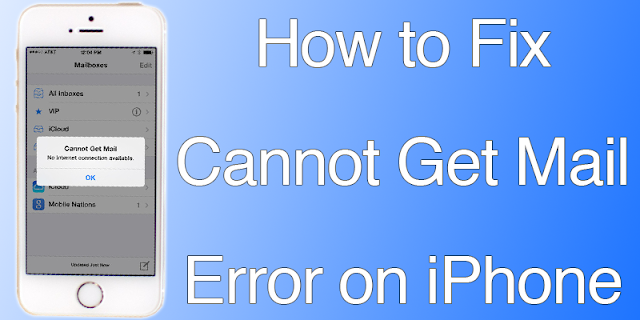
However, the Mail app isn’t all error free and at times, the platform may fail to grab the emails from their respective servers. The common error that shows up is ‘Cannot get mail the connection to the server failed’, almost every iOS user has faced this issue at least once during their iOS usage period.

How to Fix Cannot Get Mail Error on iPhone or iPad

Following are the ways to resolve the Mail app error in iOS:
  • Re-enter Password for Email Accounts: Maybe you have changed your password for the email accounts logged in with the Mail app, but didn’t update the password in your iOS Mail app. This is one of the most happening reasons for Mail app not working properly in iOS platform, the solution is very easy. Navigate to Settings > Mail, Contacts, Calendar > Account > Password. Check your account listings and change the password for all your accounts. Your Apple device could ask for Apple ID for security reasons. However, once you sign in to your email accounts through Mail with updated password, the emails will be fetched and the mailbox will be updated.
  • Haven’t Changed Passwords?: If you haven’t really changed the mail account passwords yet the problem is happening, then maybe changing the password for each of your email accounts might help. Log out of all the email accounts you use with Mail, change their individual passwords through the web interfaces and re-login to these accounts using Mail. The problem should be solved.
  • Move Emails: Create a new email folder using the Mail app and move your emails to the new folder. Try syncing the new folder with your mailboxes. This should force the email accounts to sync each email with the new created folder in Mail app and the user should have new emails synced to the Mail app UI.
  • For Microsoft Exchange Accounts: The security settings for Microsoft Exchange Account may impose some conflicts in the email app. To resolve this issue, user needs to open Active Directory Users and Computers which is a tool for Microsoft Management Console. As it appears, a Windows based computer would offer better help.
  1. Inside this program, open View > Advanced Features and find your email account from the new window that opens.
  2. Click on Properties, then open the Security tab in the new dialogue box.
  3. Click on Advanced and check ‘Include inheritable permission from this object’s parent’ on the new dialogue box that pops up.
sửa lỗi không nhận được email trong iphone 
(kết nối không thành công)

làm thế nào để sữa lỗi . chúng ta bắt đầu thôi nào.
rất đơn giãn, hãy làm theo các bước sau :
1. vào Settings > Mail, Contacts, Calendar > Account > Password và nhập lại mật khẩu của bạn vào
2. kiểm tra lại mật khẩu xem gần đây bạn có thay đổi mật khẩu không, nếu có nhập mật khẩu mới vào
3. tạo một folder mới và chuyển thư vào đó, hoặc xóa bớt thư không quan trọng, nếu quá nhiều thư
4 . nếu bạn đang sử dụng tài khoản microsoft thì hãy vào trình safari và đăng nhập lại, sau đó thoát ra từ mail của iphone , rồi đăng nhập lại , thì sẽ thành công.
Read More

Fix iTunes Error 3014 When Updating & Restoring iPhone

iPhones are indeed very advanced smartphones, yet iOS isn’t really all error-free. This software platform often runs into trouble, the errors are typically user serviceable but unless the correct steps are taken, it might cause a trouble for an iPhone user. iPhone error 3014, also known as iTunes error 3014 is quite common and a lot of people had faced this lately – because a lot of people are trying to update to the iOS 10 that was rolled out just 2 days ago. iTunes encounter error 3014 mostly due to communication error between the computer and Apple servers, but there are other known problems as well.
Fix iTunes error 3014

How to fix iTunes error 3014 When you Restore / Update iPhone

Below are the top 6 tested methods to fix iTunes error 3014 and complete the restore process:
  1. Confirm Having the Latest Version of iTunes: Apparently, in order to download the latest version of iOS and install in your iPhone, iPad or iPod Touch, the latest version of iTunes should be installed on a computer. The older versions may not be able to set the connection parameters right, also there might be a conflict between different versions of iOS and iTunes.
  2. Check your Computer’s Date & Time: Having a wrong date and time on your computer would create trouble with the internet connectivity. In order to have flawless internet connectivity, having the accurate time zone and date set in a computer is necessary. If you use a Windows computer, click on the bottom right corner on the task bar and change the date & time into proper values. Try using iTunes after you are done.
  3. Operating System on your Computer: Although this is one of the minor issues that might cause an iTunes error, yet having the latest operating system installed on your computer is the safest bet. If you use Windows platform then check for Windows update using Control Panel. For Macintosh users, you should have update notification if an update is available – update accordingly.
  1. Check Internet Connectivity: If everything mentioned above is okay on your computer, the issue could be with your internet connectivity. Maybe iTunes on your computer can’t reach the Apple servers and giving you error 3014, because that’s common. Check whether any ports are blocked on your computer’s network settings, or even your router. If everything seems alright then it could be an ISP issue as well.
  2. Security Barrier: Almost every Windows user keeps a security software in their computer and they often block iTunes. The firewall would block iTunes server connections if an exception is not added in your firewall program. However, the antivirus software may even identify iTunes as a malware. Check with your security program for such issues. 
  3.  Check HOSTS Files: This is slightly advanced level task than the previous ones we have mentioned here. Open this location C:WindowsSystem32drivers\etc in your Windows computer, and locate the HOSTS file. This file should open with Notepad in your computer. If your iPhone is jailbroken and you have SHSH blob files located at Cydia or any other jailbreaking servers then you would have to add an IP address to the HOSTS file. Add this line at the end of the HOSTS file 74.208.10.249 gs.apple.com.


khắc phục iTunes Error 3014 khi update & restore

1. kiểm tra cập nhật itunes mới nhất ở đây

2. cài đặt ngày tháng chính xác trong máy tính

3. gỡ bỏ itunes cũ cài lại itunes mới nhất

4. kiểm tra kết nối mạng (itunes cần mạng để xác minh)

5. không bật tường lửa với phần mềm

6. file host trong hệ thống phải có dòng 74.208.10.249 gs.apple.com nếu thiếu dòng này các bạn có thể thêm vào.

Read More

Reset Restriction Passcode On iPhone or iPad

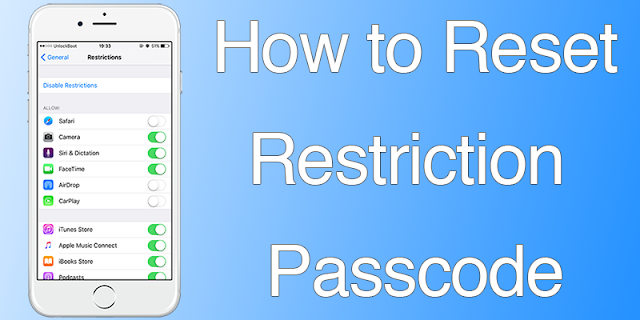
Reset Restriction Passcode On iPhone & iPad Using iBackupBot 2016

You might already know the process to reset Restriction passcode via the jailbreak tweak iFile. Nothing is simpler to reset a passcode that’s forgotten. But if your iOS device is jailbroken, then how to reset restriction passcode on iPhone or iPad?
Reset Restriction Passcode On iPhone

How to Reset Restriction Passcode On iPhone or iPad

As no jailbreak is involved, you need to take more steps to reset restriction passcode on iPhone without a fresh, complete restore that risks losing of data.
For the jailbreak method, here’s a short summary:
  1. Manually keying in a value overrides the restriction passcode.
  2. In Library/Preferences/, the file “come.apple.springboard.plist” is to be edited.
The editing process, however, is where the issue is. How can the file be edited and uploaded to the iPhone’s system again? The process to reset restriction passcode on iPhone is a bit longer, but not impossible without jailbreak. You need these 3 things:
Try the restriction passcode a few times before you start. A “failed attempt” alert should appear when tapping on Restrictions.

Do a Backup with iTunes

  • Connect iDevice to PC.
  • Open iTunes and make a backup.
  • Quit iTunes after backup but keep iDevice connected.

How To Edit Backup file

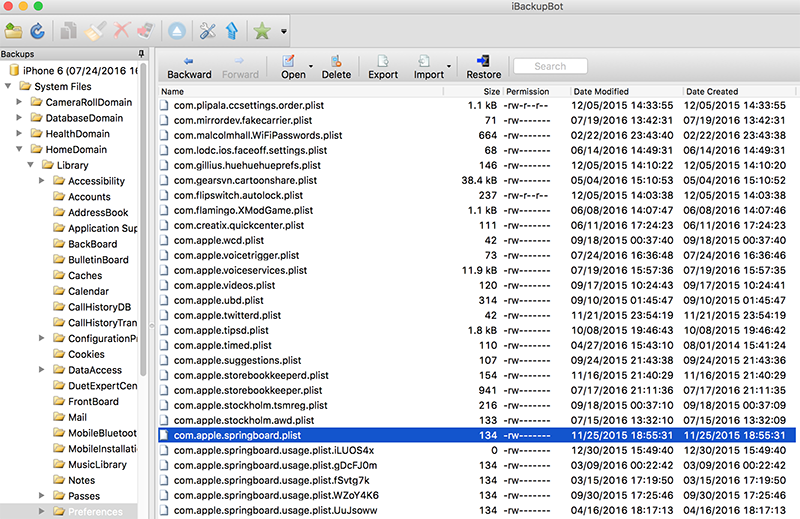
  1. Launch iBackupBot.
  2. Go to SystemFiles/HomeDomain/Library/Preferences
  3. Look for a file called com.apple.springboard.plist
Change Restriction Passcode on iPhone
  1. Open in Notepad or any text editor. Use any plist-editors if the file fails to render properly.
  2. Look for the following line:
<key>SBParentalControlsFailedAttempts</key>
<string>X</string>
(Any number is X)
  1. Below this line, add this code:
<key>SBParentalControlsPIN</key>
<string>1234</string>

  1. Save the file and restore it in iPhone through iBackupBot (press Control + T).
Now reboot your iPhone and press 1234 to restrict passcode. It should work.
That’s all. You can then disable or reset restriction passcode on iPhone.


khôi phục mã giới hạn trong iPhone & iPad dùng iBackupBot 2016

đôi khi bạn quên mã giới hạn iphone của mình . bạn không  phải lo lắng nếu chiếc iphone của bạn đã được jailbreak . nếu chưa được jailbreak thì bạn làm theo hướng dẫn jailbreak này hoặc có thể tìm hiểu thêm trong blog của mình có rất nhiều bài hướng dẫn. mọi việc sẽ trở nên thật đơn giãn. giờ chúng ta bắt đầu nào.
Reset Restriction Passcode On iPhone

làm thể nào để khôi phục mã giới hạn trong idevices

trong tay bạn là chiếc iphone đang bị khóa mã giới hạn. một số tính năng bị hạn chế vì bạn không thể cài đạt được khi không có mã giới hạn. nếu iphone đã được jailbreak thì điều này thật đơn giãn để giải quyết vấn đề , mà không cần phải chạy lại chương trình , không mất dữ kiệu của bạn.

các bước thực hiện như sau:
  1. vào thư mục Library/Preferences/ và tìm đến tệp tin “come.apple.springboard.plist”
  2. mở tệp và chỉnh lại mã giới hạn
yêu cầu:

tạo bản sao lưu bằng itune

  • kết nối thiết bị với PC.
  • mở itunes và nhấn vào sao lưu.
  • thoát itunes khi sao lưu thành công vẫn giữ kết nối với iphone.

thực hiện chỉnh sửa tệp tin sao lưu

  1. chạy iBackupBot.
  2. tìm đến SystemFiles/HomeDomain/Library/Preferences
  3. tìm tệp com.apple.springboard.plist
Change Restriction Passcode on iPhone
  1. nhấn đúp vào tệp tin để mở
  2. tìm đến dòng:
<key>SBParentalControlsFailedAttempts</key>
<string>X</string>
(X có thể là số bất kỳ, đây chính là mã giới hạn)
  1. giờ ta biên tập thành:
<key>SBParentalControlsPIN</key>
<string>0000</string>
( 0000 là mã giới hạn mới, bạn có thể giữ nguyên mã hoặc đổi số bất kỳ nếu muốn )
  1. lưu lại rồi thoát iBackupBot (nhấn Control + T). khởi động lại iphone
giờ mã giới hạn mới là 0000. bạn thể xóa hoặc dùng mà này để bật tính năng bị hạn chế trước đó.


Read More

Download iFile iPhone App Without Jailbreak

Download iFile iPhone App Without Jailbreak

Download iFile for iPhone
It’s essential to have an app that manages and knows your iPhone, and you need to have the best one. iFile is one of the most recommended apps for the purpose. Since it’s not there on the App Store, download iFile iPhone app can be a challenge, especially if you device is not jailbroken. For those who don’t know, iFile stores all the files in a single place so that they can be accessed easily and save time. There are several ways to download iFile iPhone app without jailbreak, and here’s an easy one!

Easy way to Download iFile iPhone App

We can understand that jailbreaking may not be an option for you. This mentioned website is the answer to your issue. It is compatible with the latest iOS version, and can be installed on all Apple devices.
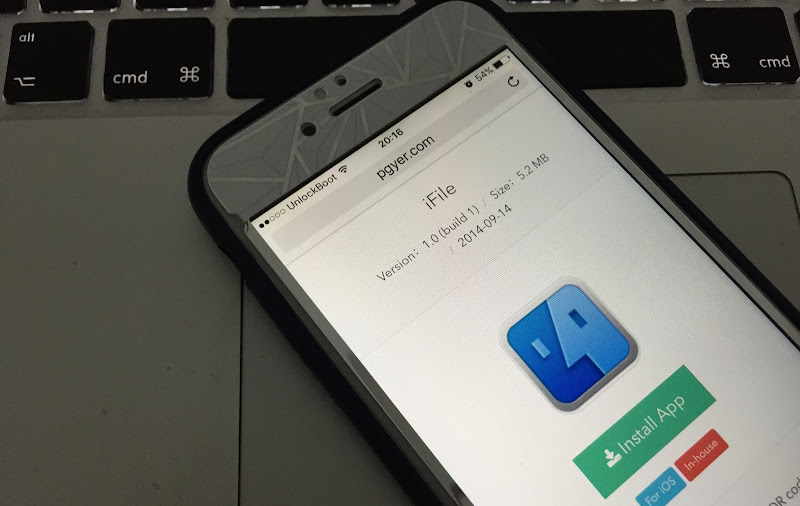
  1. Launch Safari on any browser and enter this URL: ifile.
  2. A window will pop up with a Download link. Press download and after a few seconds, a pop up will appear with the install option. Start the installation by clicking “install”.
Install iFile iPhone
Before download iFile iPhone app without jailbreak or Cydia, follow the steps mentioned below.

Setting changes before installing iFile on iDevice

Now, since the device is not jailbroken, there is a minor tweak that needs to be done on Settings. Change your iPhone’s date to a month before. For instance, if today is 7th April, 2016, change it to 7th or 8th March, 2015. Reports say that this works even if the date is changed back to the year before the date of installation. There is no need to worry; this needs to be done once. After installation is done, the date can be changed to the present one.
Install iFile Without Jailbreak
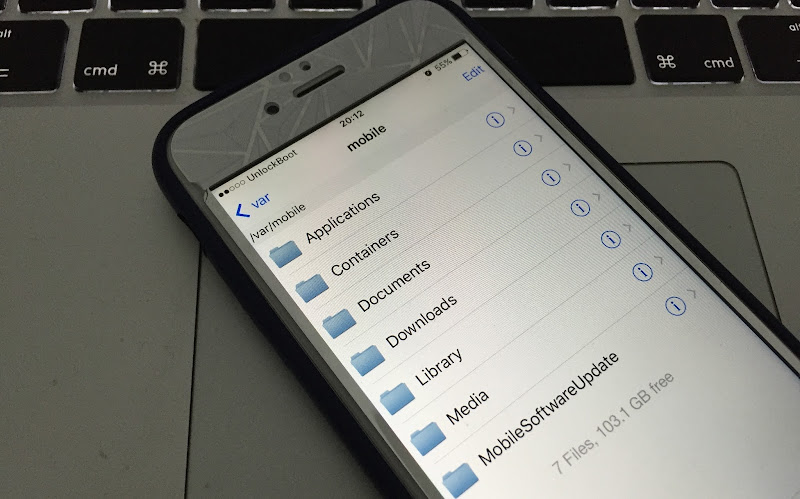
Also, depending on the connection, download iFile iPhone app won’t take much time. After installation, head to the main screen and search for the iFile icon. Tap it and iFile will manage files. The app is recommended as it’s a 1-stop-shop for all regular app demands like install, delete, cut, paste, copy and other functions.
It’s the complete app for your device. Without jailbreaking the iPhone, the above-mentioned instructions are the simplest way to download iFile iPhone app.


cài iFile cho iPhone không cần Jailbreak

Download iFile for iPhone
một ứng dụng tuyệt vời cho iphone. giúp chúng ta có thể làm nhiều hơn những gì có thể với chiếc điện thoại của mình. không còn nghi ngờ gì nữa nếu ai đã tùng sử dụng chiếc iphone được jailbreak, thì sẽ hiểu ifile có tác dụng lớn lao thế nào. thế nhưng đôi khi các bạn lại không muốn hoặc không thể jailbreak iphone của mình vì phiên bản ios quá mới chưa hỗ trợ.

đây là cách đơn giãn nhất để có ứng dụng ifile  :

  1. vào Safari và click vào đây: ifile.
  2. một cửa sổ mới hiện ra , nhấn vào Download link. sau đó nhấn vào  “install” trong chiếc iphone của bạn
Install iFile iPhone

lưu ý khi cài ifile

cài đặt thời gian bằng tay trở về 07-03-2015. sau đó mới tiến hành cài đặt. sau khi cài đặt thành công các bạn có thể chỉnh lại mốc thời gian hiện tại. sẽ không có điều gì bất tiện cả.
Install iFile Without Jailbreak


cài đặt này sẽ chỉ tốn khoảng 5 phút . rất nhanh chóng đúng không nào. sau khi hoàn thành thì biểu tượng ifile sẽ xuất hiện giống như các ứng dụng bình thường khác. nhấn vào biểu tượng và bắt đàu sử dụng thôi nào.
Read More

Boost iPhone WiFi Signal Strength

How to Boost iPhone WiFi Signal Strength

WiFi issues are not common for iPhone users. However, there are always instances when the WiFi signal goes down, and it sucks when that happens. Did you know that it’s not very difficult to boost iPhone WiFI signal? That is important to do as poor WiFi reception slows downloads, makes streaming crappy, etc.
Boost iPhone WiFi Signal

5 Ways to Boost WiFi Signal on iPhone / iPad

Here’s What You Can Do to boost iPhone WiFi Signal Strength:

1: Remove the Case

Improve WiFi Signal on iPhone
If there’s a case on your iPhone, it could be blocking the WiFi reception. Cases made out of silicone rubber, TPU or plastic don’t interfere with reception, but other materials might cause an issue. The easiest way to get your iPhone WiFi signal back strong is to remove the case. Especially if you use a metal case - you must to remove it to get better WiFi and GSM signal. You need to test this step though, as the issue could be something else.

2: Restart WiFi & iPhone

Restart the WiFi modem/router to clean a few clogs. You may be able to boost iPhone WiFi signal by switching off the WiFi and turning it back on after a minute’s interval. You can also do the same with iPhone, turning it off, waiting a minute, and turning it back on to see if it solves the issue.

3: Set Manual DNS on iPad/iPhone

Boost WiFib Signal on iPhone
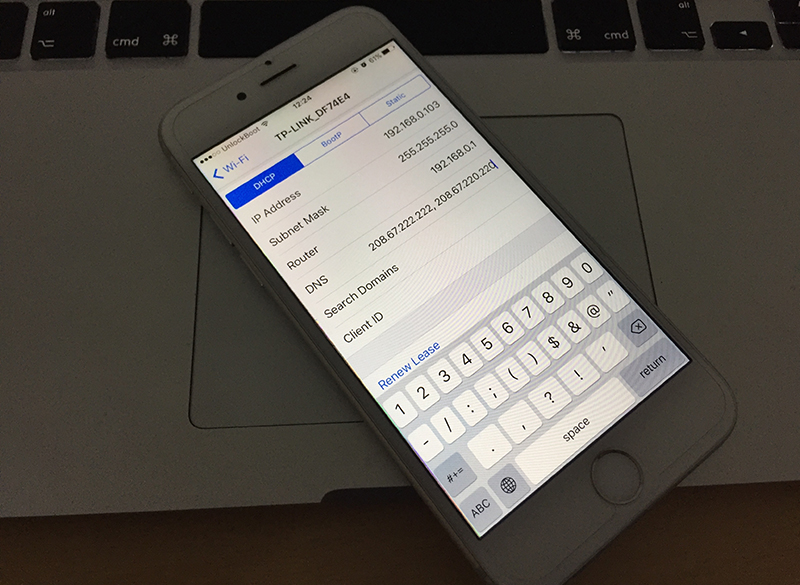
In iPhone’s preferences, you can set up manual DNS to capture data from the web. This can be done with the following steps:
  1. Google IP addresses: 8.8.4.4, 8.8.8.8 are two you can use.
  2. OpenDNS: 208.67.220.220, 208.67.222.222
  3. Launch Settings – WiFi – Tap “i” icon on the connected WiFi network’s right.
  4. Scroll below and select DNS. Enter any of the DNS addresses given as they are.
  5. Restart iPhone’s WiFi.
While automatic DNS setup is optimal, it doesn’t work in some instances. In such situations, OpenDNS, Google, and other public DNS work to boost iPhone WiFi signal.

4: Update the iOS Firmware

Software Update iPhone
Consider this measure an afterthought, as there are no boost iPhone WiFi signal related updates in the current version. However, it’s best to keep your iPhone updated to the newest firmware.

5: Invest in a New Router

A new router can often fix WiFi issues. Test a new router for a few days to see if you are able to boost iPhone WiFi signal. If the signal strength is good with the new router, than the issue of bad signals was surely due to your old router. You can also borrow a router from a friend to test the WiFi before investing in a new one.
With these tips, you’ll surely be able to boost iPhone WiFi signal.
Read More

Fix Pokemon Go Crashing on Startup on iPhone

How to Fix Pokemon Go Crashing on Startup on iPhone

Pokemon Go is now officially the most popular game on earth. It has surpassed the most popular online game Candy Crush Saga last week, and few statistics said people now prefer Pokemon Go over porn! If that doesn’t lure you into trying Pokemon Go for at least once, then what will?
Fix Pokemon Go Crashing on Startup

Fix Pokemon Go Crashing Constantly on iPhone

However, Pokemon Go is only at its initial stage and not totally bug free. Most of the world’s regions are still outside of the Pokemon Go coverage, thus you may not find any Pokemons in your Pokemon Go interface except the very first Pokemon they give you for the training. The Pokemon love of people across the world is getting more intense, but the server issues are causing trouble. Lost connection with server, Pokemon Go Crashing on startup or unresponsive Pokemon Go app are common issues with iPhones and iPads right now, and that’s not letting the players have the fun to the fullest while playing Pokemon Go.
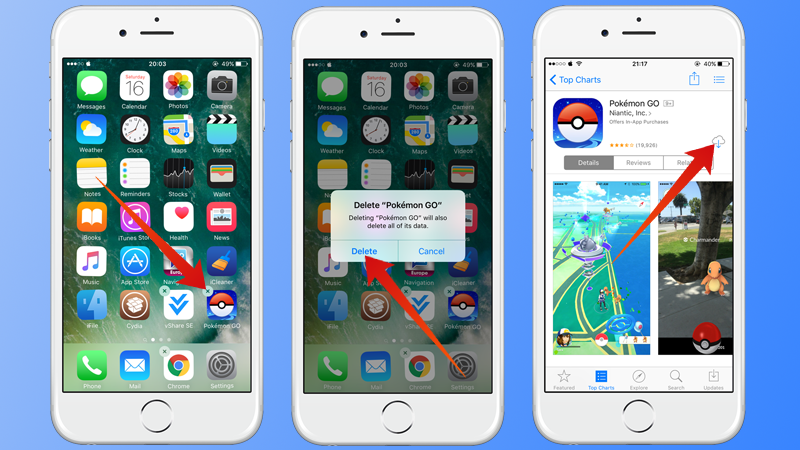
If you use an iPhone or iPad and Pokemon Go App crashing on startup or you got a server connection issues on your device, then keep on reading through the following to know what your steps should be.

1: Wait for Sometime and try Again

Pokemon Go servers were halted few days ago due to overload, and technical errors like that could happen again. In the most cases users got this error: Our servers are humbled by your incredible response. If you find your Pokemon Go app on iPhone or iPad is unresponsive, close the app, kill it from the background, disconnect your internet and wait few minutes till you start all these back on again. Also, ensure your internet service provider isn’t blocking access to the Pokemon Go servers. Start over the whole process after waiting few minutes and see if the issues are resolved.

2: Update or Reinstall

Pokemon Go Crashing on iPhone
You could be using a buggy version of Pokemon Go app, as the initially released versions in fact had lots of trouble in the coding. However, the developers go these issues patched and released a bug free version in the App Store, and you might be missing out on that. Check in the App Store for an update of the Pokemon Go app. If you can’t find any, then try reinstalling the app. First uninstall the iOS app, then download and install from the App Store again.

3: Log Out and Sign In Again

If your Pokemon Go doesn’t seem to have proper connection with the server, you could try logging your user account out and re-login using your credentials. You should remember the username and passwords you have used with Pokemon Go since these might be required for errors as such.

4: Change the Network

Pokemon go not loading
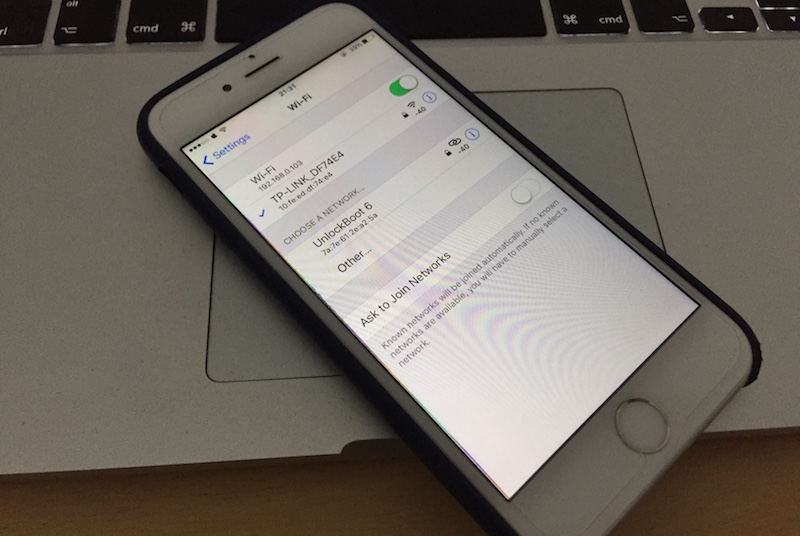
If you can’t connect to Pokemon Go while connected to a specific network, try changing the network. Try the Wi-Fi from the coffee shop across the street, or go to a mall where strong Wi-Fi coverage is provided. Or you could just ask a friend or neighbor next door, or rely on your cellphone operator’s mobile data – you’ll need that connection for Pokemon hunting anyways.

5: Reset All Settings

Pokemon go server crash
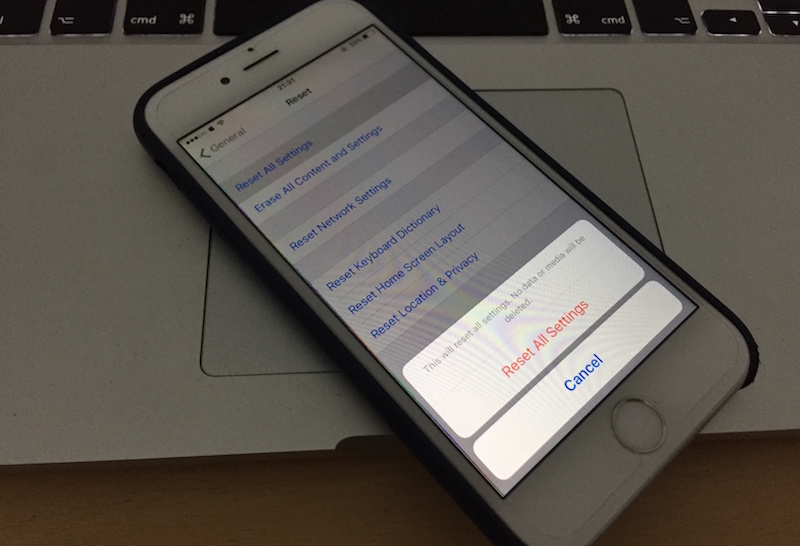
Although we wouldn’t suggest resetting the whole iPhone/iPad for playing Pokemon Go, but you could give it a try if you are a very serious Pokemon fan. To do that go to Settings – General – Reset – Reset All Settings.
Conclusion: These are the ways you could resolve issues like Pokemon Go crashing or server connection issues on an iPhone or iPad. These simple steps have proven to be effective in resolving Pokemon Go issues.
Read More

Fix iPhone 6 Plus & 6 Screen Flickering Issue

How to Fix iPhone 6 Plus / 6 Screen Flickering Issue

iDevices sometimes have display issues like iPhone 6 screen flickering. This is because of a faulty hardware, but there are some instances where the issue could arise because of a software glitch. This post highlights the measures you can take to resolve iPhone 6 Plus and iPhone 6 screen flickering issues, regardless of whether it is due to a software or hardware glitch.
iPhone Screen Flickering Fix

How to Fix iPhone Screen Flickering Issue

1: Switch on Reduce Transparency

Fix iPhone 6 Screen Flickering
Switch on this display feature that’s available on iOS 9 and above firmware by going to Settings – General – Accessibility – Increase contrast, and toggling “Reduce Transparency” to on.

2: Modify Screen Brightness

Adjusting screen brightness may fix the issue. Go to Settings – Display & Brightness – disable Auto Brightness, and drag the “Brightness Slider” downwards to reduce screen brightness.

3: Reboot iDevice

Fix iPhone Screen Flickering
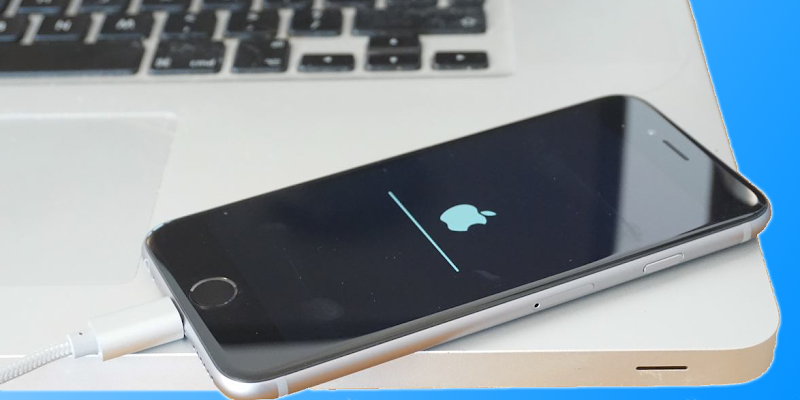
If this is your first experience with iPhone 6 screen flickering, reboot your iPhone and see if the problem continues. Also, if the flickering occurs due to a broken Cydia tweak, hold the Power and Home button to boot into safe bode until the screen is black. Then follow these steps:
  1. Leave the Home button but continue holding the Power button.
  2. When the Apple logo appears, hold “Volume Up” until springboard shows.
  3. The iPhone will be in safe mode already if the settings menu no longer show tweaks.
  4. If the problem goes away, it was due to a broken Cydia tweak. Remove or disable that tweak.
Restart your iPhone to exit safe mode. The tweak should be in Settings menu after the exit.

4: Hard reset

This will erase all personal data, so make a backup to iCloud or iTunes. A factory reset can be done from the Settings menu.

5: Check memory

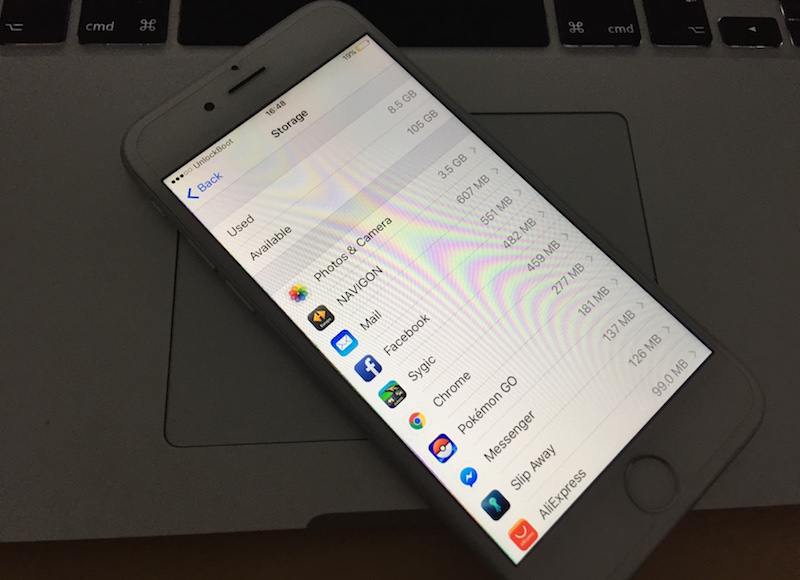
iPhone Memory Check
Sometimes, iPhone 6 screen flickering happens due to insufficient internal memory. Other signs of insufficient memory include unresponsive or frozen screen. If the memory is full, deleted unwanted apps to free it up.
Do this 5 things to fix the issue if it’s caused by a software glitch:
Read More